25childenda

25 Child Endangerment Charges for Cannabis

The Tucker Family Face Child Endangerment Charges?

The Tucker Family is charged with 25 child endangerment charges for Cannabis. Erica Tucker didn’t want the harmful pharmaceuticals she was prescribed for her ailments. So she decided to try a holistic medicinal approach: cannabis. Eventually, Erica weaned herself away from all pharmaceuticals and found herself 100% on marijuana.
Erica has five children, including a newborn she breastfeeds. She was told that the man-made pharmaceuticals she used to take were harmful to her children. Mainly because the drugs would transfer to the children through breastfeeding and possibly interfere with their development. So she decided to treat herself with marijuana instead.
Unfortunately, not all treatments (pharmaceutical or all natural) are perfect. Erica had a mal seizure that put her in the ER. And that is when the rug was pulled out from beneath her feet. The Tuckers received numerous child endangerment charges on May 8th, 2017 because of Erica’s cannabis use.

What was the problem?

When the doctors found out she was breastfeeding while on marijuana, all five of her children were immediately taken away from her and her husband. The baby (at 22 months) tested positive for marijuana because she was breastfeeding while on cannabis. The children were sent to foster care, but eventually, Erica got her children back. Erica and her husband are facing a host of child endangerment charges. In fact, they received five charges for each child. The public is outraged because this is one more example of how the war on drugs is tearing families apart.

Is Marijuana Less Invasive than Harm-aceuticals?

According to societies mores, it would’ve been preferable for Erica to continue taking the harmful pharmaceuticals with terrible side effects. Even though those pharmaceuticals cause more damage to infants than cannabis. If she had opted for the more damaging treatment, her children wouldn’t have been taken away and the Tucker’s wouldn’t be facing child endangerment charges.
Erica choose the less physically harmful approach to her treatment and now the Tucker parents are being treated as horrible parents by their peers. Yet now their family is suffering the consequences of taking the road less traveled. This story is another example on the terrible effects on the war on drugs and the damaging impact it has on normal families looking for healthier alternatives to treatment.

marij disney

Marijuana Banned at The Happiest Place on Earth

Marijuana Banned from Disneyland and Disneyworld!         

Anyone caught bringing marijuana into the park or found smoking it on premises will end up in Disney Jail! Marijuana banned from Disneyland and Disneyworld indefinitely. According to High Times, Walt Disney World has forbidden Cannabis of all types from their parks in California and Florida.
Coincidently, marijuana just became legal in California and Florida. Despite the current legal state regulations Walt Disney World has continued their strict prohibition on alcohol and marijuana. Social perceptions have evolved over the years and Disney has kept an iron-grip on its ‘child friendly’ reputation.

What Else is Banned in Disney Worlds?

Cannabis and alcohol are not the only things banned in both resorts. Selfie sticks, drones and of course weapons of any kind are absolutely banned from both parks. Walt Disney World will continue to ban these items because their parks are attempting to cater to a broad family friendly environment.
Some religious schools, churches and other organizations that are not known to be progressive would stop attending both theme parks if they allowed the banned items. This makes up a majority of their sales. The Walt Disney corporation would lose millions of dollars if over half of their customers stopped attending.

Does Anyone Sneak-a-Toke?

Why yes, plenty of people attempt to sneak-a-toke. The wait time for several rides are hours long, and eating cannabis is easier to quickly ingest and get away with than smoking a joint. Others have reported taking a quick vape hit because it’s harder to spot who just took a hit or where the scent is coming from. So yes, there are lots of people who are sneaking bits and hits here and there.
Many people will still take a risk and consume cannabis somehow because they have legitimate ailments and cannot wait till the end of the day to consume marijuana in some form or another. In the end, ailments don’t just go away because it is an inconvenient moment to have them. People who use cannabis as a medicine simply won’t get to experience Disney magic unless they keep it under wraps.

brainaging

Cannabinoids Slow Down Brain Aging

How Do Cannabinoids Keeps the Brain from Slowing Down?

A German study found that brains of older mice benefited from cannabinoids. The main chemical tested is known as THC (tetrahydrocannabinol). The gains were incredibly significant because the minds of older mice were on par with the minds of other younger mice who were abstained from cannabis.
THC was tested on several mice from different ages for two months. The tests were all repeated daily. The tests included navigating through a water maze and recognizing familiar objects. Younger mice on THC struggled to accomplish their tasks, but the older mice showed better brain performance.

How Do Older Mice Benefit from THC?

The biochemical pathway of older mice grows less active over time, but science has shown that THC causes their brain’s biochemical pathways to grow more active. The results are astonishing because a low dose of THC was all that was needed to engage these biochemical pathways.
The mice did not seem to experience the effects normally associated with consuming THC though. The older mice on small amounts of THC could accomplish their tasks as well or better than younger mice who were THC free. This has big implications to how we approach human testing in the future.

What Are University Scientists Hoping to Accomplish with Their Findings?

Researchers from the Hebrew University and the University of Bonn plan on starting human trials by the end of the year. Human testing will be similar to the mouse studies and explore the ramifications of various levels of use. Basically, humans of varying ages will be tested with familiar tasks on a daily basis to see if they get worse at them.
This is just the first phase of testing. The hope is that the older human brain can be regenerated by at least five years to a decade without the use or need of extra invasive care. We are still a long way from receiving cannabis treatments for things like Alzheimer’s and other forms of dementia but this is an important step in the right direction.

Top 10 Common Dabbing Mistakes

We have all made some dabbing mistakes when getting started.

Some of us learned from our dabbing mistakes while others remain ignorant of the finer points of canna culture. Regardless of where you fit along the spectrum of cannabis intelligence, you are sure to have experienced at least one of these common mistakes. These are in no particular order as each person will struggle with different parts (mine is overheating) more than others.
There are also more ways to counter these problems than I have time to list but I encourage you to share any tips or tricks with other readers in the comment section below.  We are all here to learn after all. So without further ado, here is my list of the top 10 dabbing mistakes and how to avoid them.

Overheating the NailBig Dab Rig

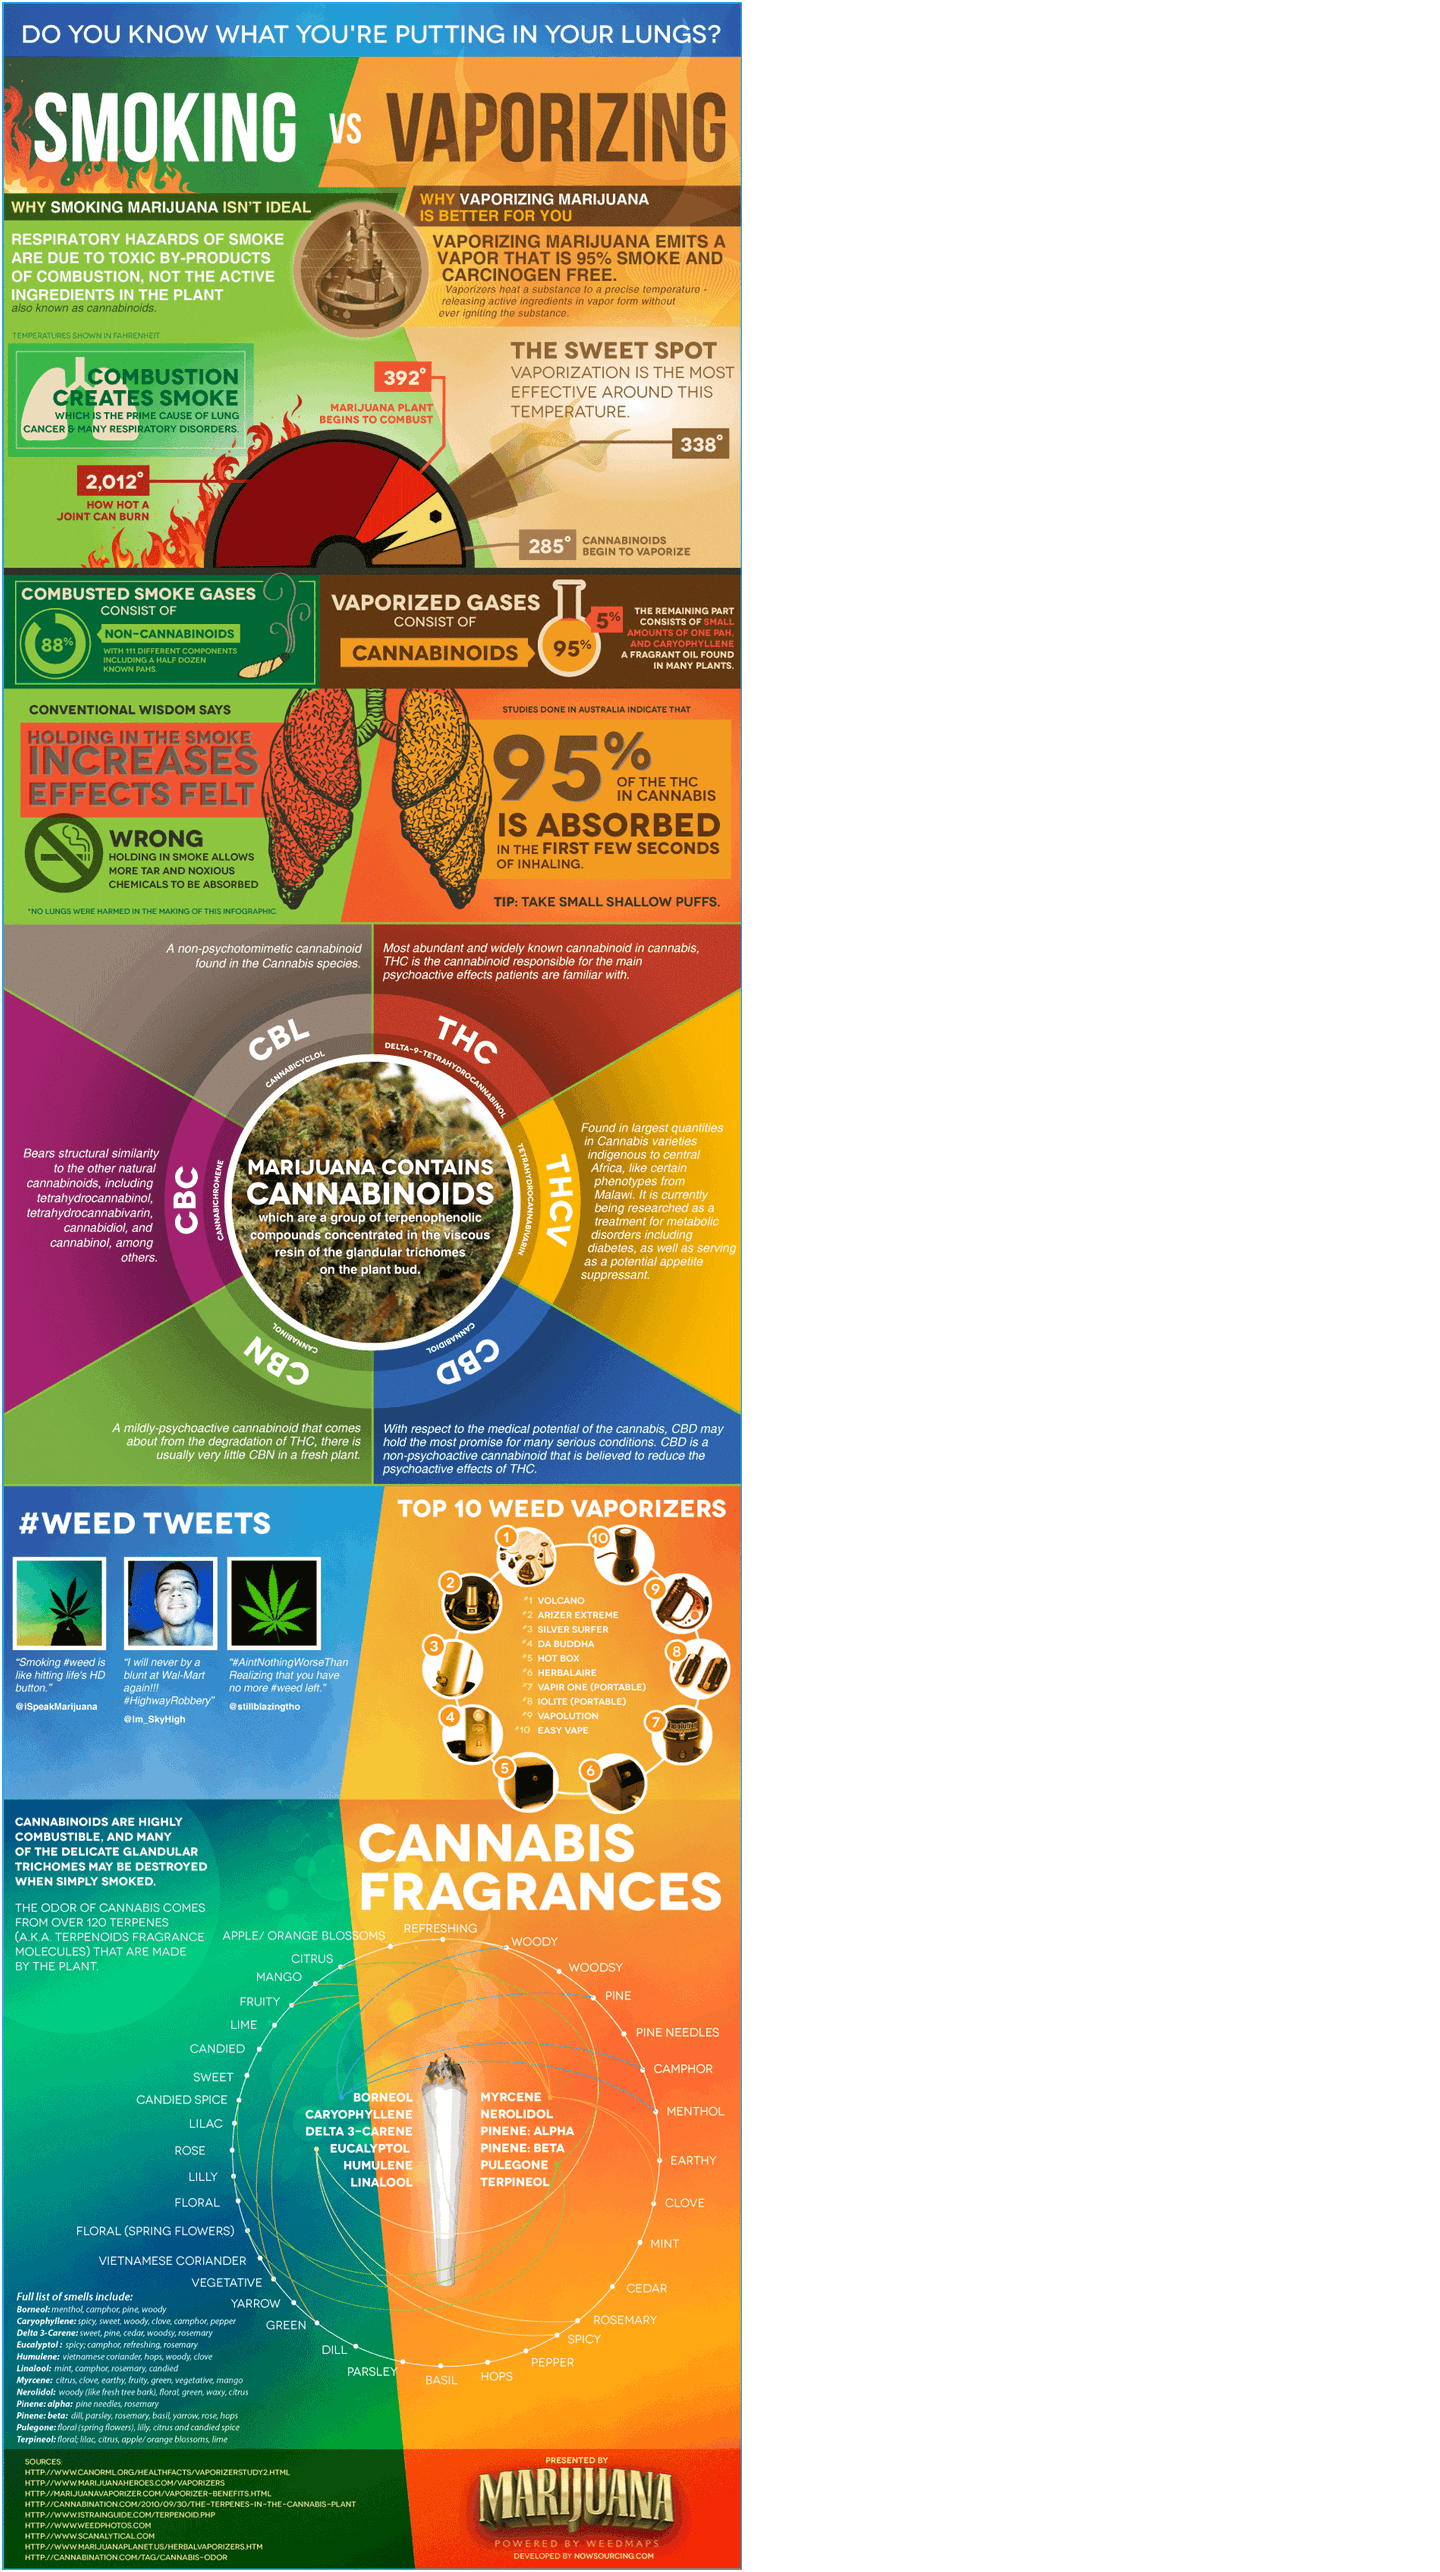
The normal way to heat a dab rig is with a torch. The goal is to heat the nail up enough that the concentrate vaporizes without combusting. Many dabbers don’t wait for the nail to cool slightly before taking their hit. These dabbing mistakes cause the concentrate to combust instead of vaporizing.
Combusted concentrate is significantly more harsh, lacks key terpenes and produces a lower quality high. Since terpenes act synergistically with THC and CBD to produce more powerful effects, burning them up robs people of the very experience they are trying to get. Glass should be a dull red, titanium and ceramic nails should be their natural color before dabbing

Solution:

It’s OK to heat the nail until it turns red hot. It can burn off waste from the last hit and creates a uniformly hot surface. Just wait for it to cool before taking a dab. The amount of time to wait depends on the thickness of the material but it is good to wait until just before the nail returns to its normal color.
Titanium and ceramic nails change color at a higher temperature so require longer heating times. Ceramic has the highest “red hot” temperature, followed by titanium, then crystal and finally glass. Titanium ends up retaining the most heat so it takes the longest to cool while glass is the worst heat conductor and cools quickly.

Grabbing the NailHot Dab Nail

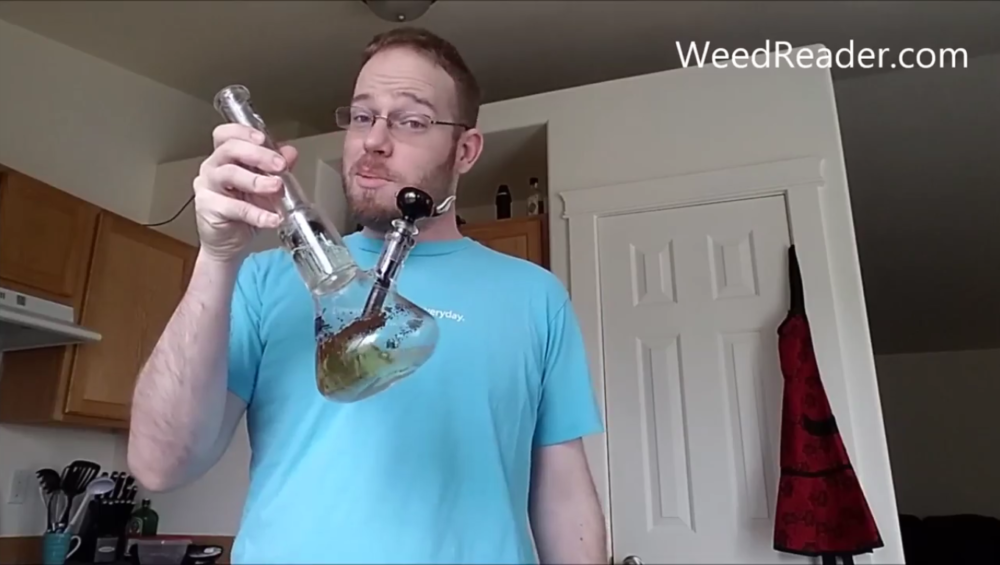
Dabbing is a fairly new way to consume cannabis. Most people start by smoking flower through a glass pipe or bong. Bong users especially fall prey to rookie dabbing mistakes. When they are ready to clear the bong, they try to remove the nail in the same way the bowl is pulled in a normal bong.
It normally takes only a moment for people to realize their mistake. As they try to remove the bowl, their nervous system registers that their fingers are literally melting and they reflexively drop the scorching hot nail. If their reflexes are fast, it drops back in place. If not, pray it doesn’t shatter on impact with the ground.

Solution:

Don’t let people hold the rig. If the dab rig rests on a table or counter and doesn’t have to be held to hit. Having hands away from the rig can also give someone the moment they need to realize how hot that thing is and avoid touching it even if they start to reach for it.
Now, this is not always possible with exceptionally small pieces. If at all possible, don’t start a new dabber off with a small dab rig. Pain is a great teacher though so some people only need to grab the nail once and they will never forget why that is a bad idea.

Overloading the BowlOverloaded Bowl

Concentrates have to be heated to several hundred degrees before they vaporize. As product comes into contact with the nail, the two are at different temperatures. As they remain in contact with each other, their temperatures begin to equalize. The more concentrate that comes into contact with the glass, the faster it cools.
Adding more concentrate than the nail has heat to vaporize results in thin smoke and wasted material. Do this for long enough and the nail will become coated in a black resin-like substance. This residue catches on fire, produces foul smoke and can cause the piece to retain heat (which leads to spontaneous breaking).

Solution:

Make sure to use the right amount of product and heat. Thicker nails retain their heat longer than thin walled nail so the best bet is excess heat. Use a torch to heat the nail until it no longer smokes.
Electronic nails get buildup as well so periodically torching or otherwise cleaning the nail is part of a dab rigs regular maintenance. Use an old toothbrush and a rubbing alcohol/salt solution to clean the caked on residue without much risk of breaking the nail.

Missing the Bowlmissed bowl

This happens to new and veteran dabbers alike. They go to take a dab and the concentrate falls to the side of the nail or on the dome. This happens most when people hold their dab over the nail before taking their hit. They forget that heat rises so the 6 or so inches above a heated nail will melt concentrate and cause it to drip.
The bigger and less viscous the dab, the more likely it is to miss the intended target. If you have ever tried to drop something from a high place on a specific target, you know that the further away you are, the harder it is to hit. Crumble and saps tend to be difficult to put where wanted so contribute to this problem more than wax or shatters.

Solution:

Hold your dab over a container or to the side of the dab rig. Remember that the closer the dab is to the nail, the faster it is going to melt. Move the dab to the nail quickly but stay under control. Approaching the  nail from above at a 45 degree angle will give the most time and control over the quickly melting concentrate.
About one inch from the nail, most concentrate loses cohesion. What was wax or shatter becomes a liquid in about half a second so don’t delay when getting close. There is a lot of technique involved in getting exceptionally long or large dabs to hit properly. Finding the proper balance of speed, distance and heat is tricky but can be done.

Dropping the Dab Down the Center

This is a problem that comes from the overall style of domeless nails. You basically have a doughnut of glass with a hole in the center. Some people end up putting the concentrate into the center hole instead of in the glass cup. This results in the concentrate completely bypassing the heating element and dropping directly into the water.

Solution:

When dabbing, make sure the concentrate falls into the cup side of the glass. The center hole is to allow the vapor to be sucked through the piece, not the actual concentrate. If the dab doesn’t drop on and stay on a hot part of the nail it simply won’t vaporize.

Missing the Rig

dropped dabs
This is another hand eye coordination problem, just the next step up. These dabbing mistakes happen most with products like crumble and shatter. Instead of the dab dropping next to the nail, this is when the dab misses the whole rig.
Trying to drop a piece on a heated nail will often result in missing the whole piece. Since crumble and shatter are stable enough to handle, it is tempting to just use your hands. The rub comes when those tender digits get close to a heated surface and you are forced to ‘toss’ it the last of the way because it basically takes vector calculus to get it right.
There is a reason that vector calculus is one of the last lessons in math too. Because getting multiple things moving just right is REALLY difficult, especially with weights in the milligrams.

Solution:

Get a good dab tool. Having the right tools will go a long way to prevent dabbing mistakes from being an issue. Many come with a pointed end and a scoop end. Using the scoop for crumble and shatter makes getting the concentrate in the right place a synch. Silicone dab tools also prevent things from sticking to the tool while being relatively cheap.

Oversized Hitsdabbing mistakes

Hitting a dab is not like hitting a pipe or joint. It is closer to a bong but is still on a different level. People new to dabbing have a hard time judging how big a given hit will be and often get wrecked as they take their first few hits. Most of the time it is hilarious to watch people make dabbing mistakes like this.
But it can be a scary experience to get so high. There are hundreds of people that end up in emergency rooms each year from getting too high. If people don’t become somewhat catatonic, they often begin to freak out and panic.

Solution:

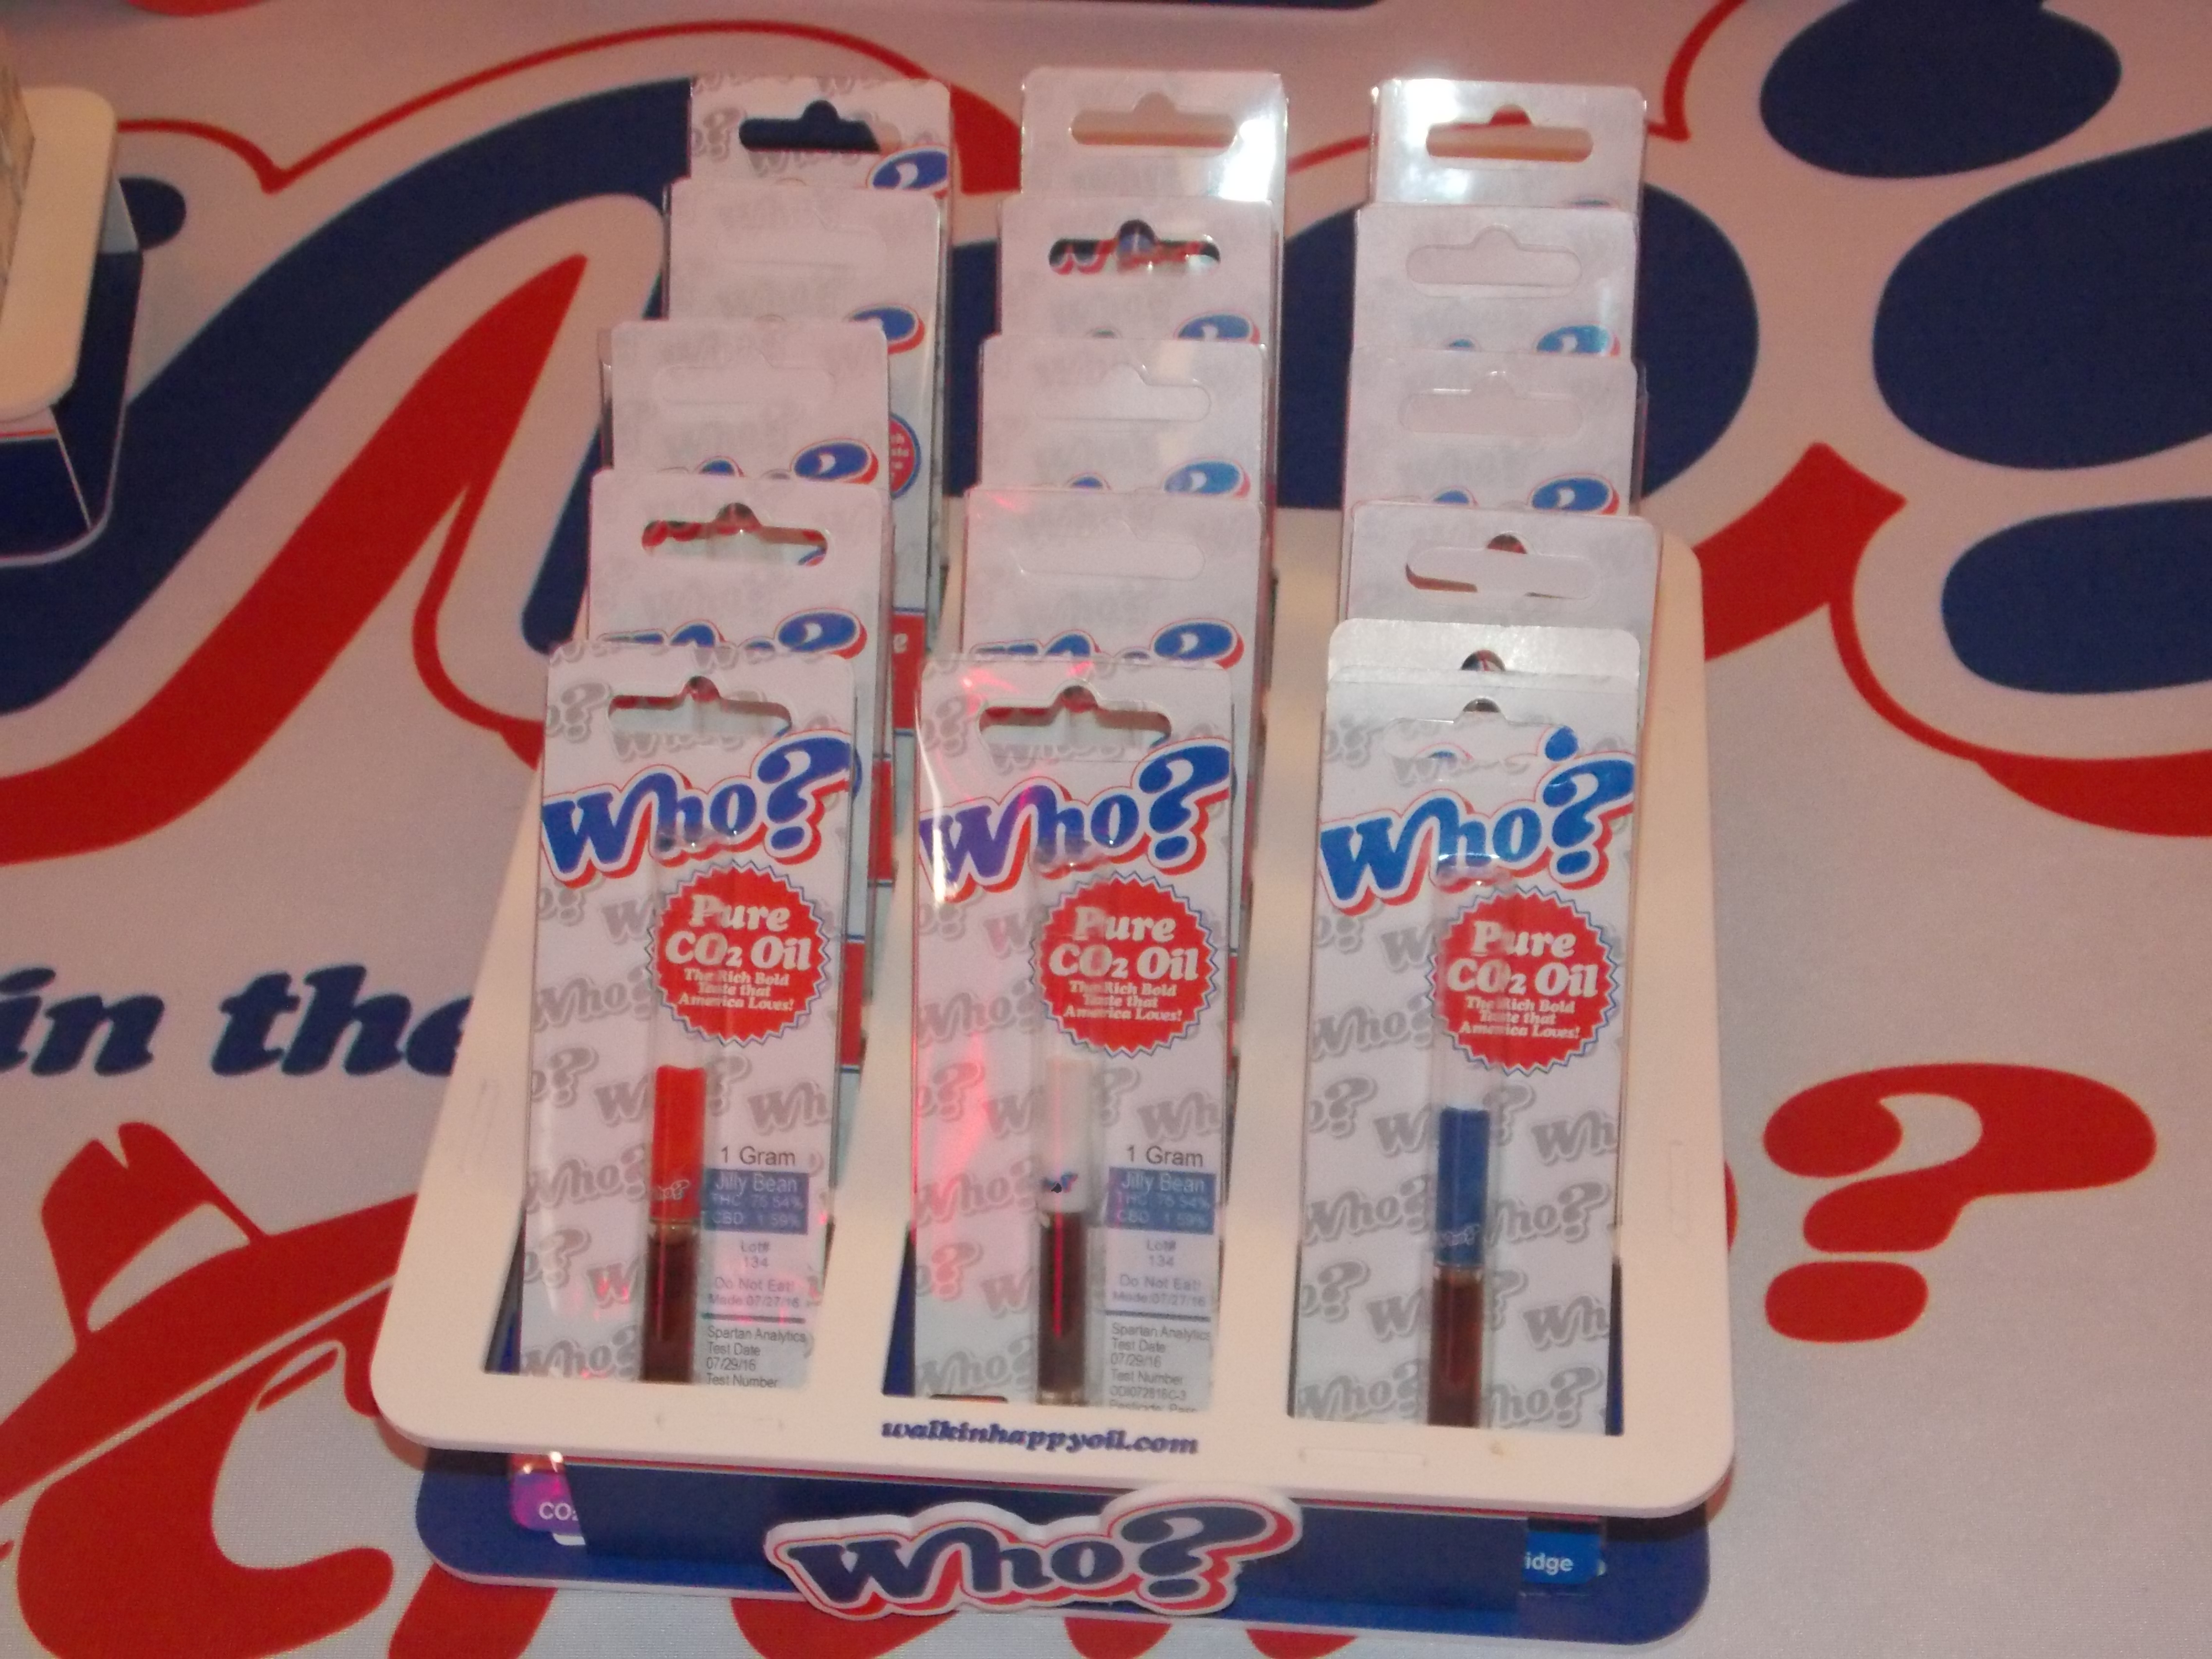
Start off slow when getting into dabs. With flower, the average concentration of THC /CBD (according to lab testing) lies around 15-25%. Concentrates rarely drop below 60% THC/CBD but can get as high as 99.9%.  That is a pretty big difference so always check the potency before taking a hit when possible.
Also, be sure to take small dabs to start. Taking a normal sized dab (about half the size of a pea) is the equivalent of smoking about 2-3 bowls of flower. A ‘dose’ of THC is commonly seen as between 3 and 5 milligrams.

ChokingHazy Daze

Our lungs are miracles of nature and finely tuned to process oxygen. When they register something other than oxygen, your lungs are designed to help get it out. Cannabis vapor is so much denser and hotter than normal air so when the lungs believe there is more smoke than air, they do their job and make you cough.
Stoners of all experience levels make dabbing mistakes and sometimes explode into bouts of uncontrollable heaving. It can last for only a moment or for several minutes. The denser and bigger the hit, the longer it takes to recover. There is a point on the inhale where the lungs decide enough is enough and with enough practice, anyone can find thier limit.

Solution:

Try taking a slower hit. Instead of sucking as hard as possible, take slow hits. This allows you to feel as your lungs approach their maximum capacity. You will feel your lungs begin to buck before they go full heave. With enough practice you should be able to get close to coughing without actually triggering the reflex.
In addition to breath control, practice deep breathing. Stretching your lungs when breathing normal air is a good way to strengthen them. It also helps your body process oxygen better and improves circulation, both key elements of processing THC and CBD.

PukingReady to puke

Sometimes a cough is so powerful that it causes you to spew chunks. Other times, attempting to burp up a hit can cause the gag reflex to go off. This dabbing mistake is similar to the choking issue where the body is trying to expel something it thinks is bad.
People with an overactive gag reflex may find themselves experiencing this regularly when taking big hits. They start to cough, and suddenly it becomes more. That is because coughing is tied to the gag reflex and a host of other respiratory systems.

Solution:

Try not to burp. It sounds counter intuitive but part of burping is swallowing. When smoke is swallowed, it causes irritation to the throat and other soft tissues. The body reacts to this irritation by trying to expel it through reflexive action. Not swallowing the smoke will drastically reduce the chance of puking.

Dropping the Piece

Whenever someone experiences one or more of the previous nine mistakes, bad things happen. Muscle spasms (like coughing and puking) can make limbs tense and smack glass into furniture. Grabbing the nail also causes reflexive motion that can lead to broken pieces.
Even people with the best intentions and a perfect tract record are not immune to dropping the piece. Get someone coughing hard enough that they start to puke and the piece gets forgotten. The most common way to drop a piece is when passing it to another person.
It takes careful coordination to pass a bong to another person. Misjudge how heavy it is or how tight a hold the other person has and the sound of shattering glass is sure to follow. When you are coughing up a lung and trying not to puke on everyone, it gets a lot harder to judge whether or not you should let go.

Solution:

The first step to prevent dropping the piece is to reduce interactions. There is a lot going on when dabbing. You have the rig, the tool, the torch and the concentrate all in your hands at once. Look for ways to keep things organizes and clear like having a special tray specifically for setting up and taking dabs. Minimizing the number of times you have to change hands or switch angles will save time, effort and reduce chance of making dabbing mistakes.
Additionally, make sure the area is glass friendly. Put down carpets/rugs, remove hard surfaces and that you store your piece where it won’t be bumped. Build a cocoon of softness around your piece and then even if it does get dropped it will survive.

Well, that’s the end of the list.

What did you think? Have you made any of these dabbing mistakes? Let us know how you avoid these mistakes or other ones you have made. I love getting to hear your stories  and getting to know our community. Thanks for reading.
 

vapes

Vapes and the Hot Science Behind Them

What is Vaping?

Vaporizing  or “vaping” has become one of the most popular ways to consume cannabis in recent years. Where old-school cannabis consumers would smoke plant matter, designers and engineers decided to vaporize the cannabis instead of burn it. The devices they created are referred to as vapes. These vapes come in a variety of shapes, power and styles and are one of the most commonly sold items in dispensaries across the nation. While there are stationary vaporizers, most of the industry is dedicated to portable devices.
One reason that portable vapes have become so common is because they are often much more discreet than smoking. Instead of creating a skunky, thick smoke that hangs in the air and clings to your body, vaporizers create an aerosol-like cloud that dissipates quickly and doesn’t linger.
Vaping is perfect for discreet or mobile cannabis consumption. For those who need to get high and then go back to dinner with grandma or at a concert, a vaporizer is the method of choice. The popularity of commercial nicotine-based vapes or “e-cigs” makes identifying a stoner in a group of vapers almost impossible.

What Kind of Vaporizers are out there?

When most people think of an electronic cigarette, they think of regular old, retro e-cigs. You buy them at a gas station, and (Vuze and Blu are two popular brands) they are made by tobacco companies. This part of the market is dominated by tobacco companies like Imperial Tobacco and RJ Reynolds. The cartridges in these vapes come pre-filled and are disposable.
In an actual vape shop, you’ll find products commonly referred to as APVs—Advanced Personal Vaporizers or “Vape Pens” and “Vape Mods”. APVs are produced predominantly by companies based in China like Innokin. They contain electronics to regulate the power level, produce a moderate amount of vapor, and are generally under $100. Mods are for use with user-rebuildable atomizers, can potentially produce tons of vapor, and can be expensive.
Both Vape Pens and Mods function on battery power. The industry has embraced advances in tech like USB-Rechargable batteries. Mods tend to have larger batteries than Pens because they need to push out a lot more enery. While a Vape Pen may last an average user 2-5 days, a Mod with the same size battery might only last 1-2 days.
Rel Vapes

Are Vapes easy to use?

Even though using a USB-rechargeable vaporizer seems infinitely easier than loading a bowl or rolling a joint, they come with their own challenges. This is especially true in the case of flower vaporizers. Loading the tiny chamber can be a headache, as can cleaning out the vaporized plant waste with anything but a specialized tool.
Cleaning comes more often in vaporizers than traditional smoking bowls as well. This is due to the dominance of exceptionally small chambers. The small chamber is due to the high amount of energy needed to vaporize plant matter (more on that later). Also, portable vaporizers eventually run out of battery, leaving you not-so-high and dry if you forget to plug it in and don’t have a USB port available.
Vaporization does have the advantage of not actually burning the plant material, which gives a clean taste, bereft of the woody finish you get when smoking. While some users prefer this nuanced flavor, many heavy cannabis users like the increased potency and cleanliness of vaping.

RSO

What’s in the cartridges?

Vaping is commonly seen as safer alternative to smoking. Vape cartridge or “e-liquid” begins with a vegetable glycerin base. Most manufacturers use certified organic VG. While the glycerin doesn’t carry flavor very well, it does produce a lot of vapor. Then comes is propylene glycol. propylene glycol—or PG—is a main ingredient in albuterol, or asthma inhalers, and is perfectly safe to inhale when vaporized.
Commonly mistaken as being a main ingredient in antifreeze (diethylene glycol) which has actually been found in mass market e-cig products, PG is thinner than VG, and carries flavor very well. The final ingredient is flavorings. These are commonly suspended in PG and are food-grade. Flavorings can be natural or artificial, and cannabis based vape cartridges usually include terpenes.
The final ingredients are the active ingredients. They contain pharmaceutical-grade nicotine or cannabinoids like THC and CBD. All manufacturers make products in varying strengths. Cannabis based cartridges are required to display concentration and overall volume of active ingredients.
Dab Rig

What is the best way to vape?

“Anything that lights the plant on fire creates respiratory irritants,” explains Dr. Mitch Earleywine, a professor and researcher at the State University of New York at Albany. When users are trying to consume cannabis in the safest way possible, there are a few things to understand about what happens to the cannabis when it’s heated. Namely, you’ll need to understand the difference between conductive and convective heating.
Conductive Heating
Vaporizers and other tools that use conduction to make cannabis smoke or vaporize typically use flower or concentrate applied directly to a hot plate. The heat changes the raw thc into a useable form and literally boils it. When dabbing, the “hot plate” is an ultra-hot metal nail that is heated to extremely high temperatures using a blowtorch.
Convective Heating
Rather than heating the cannabis matter directly with a heating plate, convective vaporizers use an electronic mechanism to heat air. Once the air reaches a certain temperature, it is forced over the plant matter/concentrate. The hot air actually heats the cannabis product, extracting the THC and turning it into a vapor without burning the substance.
Of the two types, convective vaporization is believed to be the best for your body. The convective method avoids the charring associated with nearly every other method, meaning that convective heat creates the purest form of activated, consumable cannabis vapor.

Vape Pen Cartridge

Is the high different?

Proper vaporization releases most essential oils in the plant while it stays below the point of combustion. These essential oils contain the majority of the cannabinoids and terpenes which give cannabis its effects. In essence, vaporization gives you all the good stuff and very little of the bad.
Truth On Pot explains, “a collaborative study conducted by California NORML and MAPS found that vaporizers could convert 46 percent of available THC into vapor, whereas the average marijuana joint converted less than 25 percent of THC. Likewise, patients ranked vaporizers as the most efficient method of marijuana intake — requiring a lower dose than smoking, edibles, and tea — in a recent study published in the Journal of Psychoactive Drugs.”
Here’s a handy chart from NowSourcing that breaks down why that is even further:
Vaping Infographic


weedstash

Top 10 Ultimate Weed Stash Hack

Maybe you have heard of a few or use these stash hacks yourself.

Maybe you have used similar stash hacks forever and didn’t realize others hadn’t. Whatever the case may be, here are the 10 best tricks in no specific order.

You need just the right amount of water.

Keeping weed at the optimal hydration level (about 55-65% relative humidity) can feel downright impossible. If left exposed to the open air, valuable terpenes are lost and flower will burn fast and hot. Overly dried flower also has the bad habit of crumbling into dust. Get it too wet and it won’t even smoke or worse yet, it could start to mold!
Once a stash has succumbed to things like molds, mildew, fungi or other pathogens, it is a complete loss. Don’t even be tempted to smoke the ones you “can’t see anything wrong with” if there is any evidence of corruption. The risks are simply too great to roll that dice. Drying out is an altogether different problem though.
Once a weed is dried out, it becomes harsh and burns up significantly faster. Nobody wants to smoke old, crumbly weed. We want sticky nugs that snap apart but slightly hold their shape when shoved in a bowl. Yet cannabis can be re-hydrated and return to being sticky. Many a stash has been saved by trying one of these following hacks. I have used all of them to keep my own stash in peak condition but each has its own time and place.

Citrus Boost!Lemon Skunk stash

Method: Take a small bit of citrus peel and stick it in with the weed. Must use real peels, extract doesn’t do the same.

Benefits: This hack infuses the citrus terpenes (like Limonene) into the cannabis. Since the peel has a high water content way higher than cannabis where cannabis should be at, it will rehydrate a dried out stash.

Drawbacks: Lemon peels rot. When they do, it creates the perfect breeding grounds for molds, fungi and other harmful pathogens. It can also over saturate cannabis of too much is added to a stash. This has the side effect of making the weed difficult to light and produce little smoke.

Q-Tip Quality!

Method: Simply wet a Q-tip (any cotton swab will work) and drop it in with the stash. Keep an eye on when it dries out so you can  reuse or replace the swab.
Benefits: This method preserves the unadulterated taste of pure cannabis. It also provides a low cost alternative (although way less cool) to getting a humidifier. Because swabs come sterile, mold issues are kept to a minimum if replaced often.
Drawbacks: Cotton swabs are disposable for a reason. Reusing swabs leads to cross contamination and can also be a breeding ground for mold, fungi and other pathogens.

Cotton Balled!landrace 2

Method: Similar to the Q-Tip method except that a moist cotton ball is taped to the top of the container. Reuse or replace once it dries out.
Benefits: Taping the cotton ball to the top of the container keeps it from coming in contact with the stash. This prevents cotton fibers from getting caught in the bud and limits cross contamination. Cotton balls also come sterile so there is no risk of additional contaminants being introduced to the stash.
Drawbacks: Replacing tape over and over can get to be a chore so it is tempting to simply reuse the cotton ball for extended periods. Doing so exposes the user to the same dangers of mold, fungi and pathogens through cross contamination.

You also need the right kind of storage.

Regardless if the stash comes from a legal dispensary, a guys basement or Snoop Dogg himself, you need somewhere to store it. In the old days, Ziplock baggies were the standard. Today, people can obtain legal cannabis from dispensaries that use medicine bottles. While the medicine bottle is mandated by many states for sales, they still suck for keeping a stash. Here are a few suggestions for ways to store weed that is better than the old Ziplock or medicine bottle.

Mason Jar Madness!

Method: this glass container is sold in most stores across the world. This is a simple glass vessel with threading that allows a metal ring and lid at the top. It is air/watertight, reusable and cheap.
Benefits: They comes in several sizes, produce and airtight and watertight seal, and are easy to store or obtain almost anywhere. In addition to that, they are easy to clean, don’t rust or otherwise break down over time.
Drawbacks: Glass is fragile and has a tendency to break when exposed to extreme temperature changes.

Divided Stash Storage!

Method: Use two different sized containers to store your stash. The first is a small “daily” jar that keeps what you typically consume in a day. The second is “the vault” where you store your remaining cannabis. Load bowls from the daily jar and only open the vault when needed.
Benefits: This method reduces stash moisture loss from cycling the air in the jar. It helps budget or regulate the amount of product consumed in a day. This method also helps maintain stash security by not advertizing you have a pound of weed every time you load a bowl.
Drawbacks: Unnecessary if you get a jar that is too small or don’t buy more than a day or two worth of product at a time. It also adds one more step to the smoking ritual.

Freeze!

Method: Take any amount of cannabis you don’t plan to use immediately and put it in the freezer in a sealed container. Freezer bags are commonly used for this method. Freezing the weed prevents loss of hydration over extended periods.
Benefits: People have stored weed in freezers/fridges for years and still had a pleasant experience. Freezing cannabis makes trichomes brittle and easy to break off for ice wax and other concentrates.
Drawbacks: Just like meat, weed can get freezer burn if it is not sealed correctly. Cannabis can also be exposed to many bacteria and other pathogens from decaying food nearby (I’m looking at you Strawberries!) so keep a tight lid on it. Frozen trichomes also break off much easier than at room temperature.

Silicone Serenity!

Method: Instead of glass or plastic, use a silicone container. There is a wide variety available online, at dispensaries or at head shops built to suit your needs.
Benefits: Silicone wont shatter/rip/shred/cut/melt under normal use. It is even safe to touch with a warm dab tool when frozen (just not a red hot tool). Wax and other concentrates can’t stick like they do to glass or plastic. They also come in a wide variety of colors and shapes.
Drawbacks: Can be very expensive, especially when getting something airtight and cool looking.

We have all had times when there isn’t enough to go around.

Sometimes there is more month than money and we are faced with some hard choices. Do you share what you have and possibly spend days without THC or keep it for yourself? These tips can help you make that decision without alienating yourself or getting caught holding out. Just don’t get mad if someone else uses these tips too. It’s just a matter of making the most of what you got.

Twice Smoked Weed!

Method: This requires that you can suspend you weed in the pipe itself (best with screened metal pipe). You store a nug in the middle of the pipe so that every hit has to pass over the nug before making it into the users mouth.
Benefits: The stored nug gets coated with a layer of resin (poor man’s wax) and therefore gets additional THC added to it. It also makes it easy to carry around a second bowl for personal use if you are limited on how much you can share.
Drawbacks: Your delicious weed gets coated in resin. The terpene profile is destroyed and if left for several days, the nug gets dried out. Can make smoking the stored bud feel really harsh.

Double Cup It!

Method: Using two soft drink cups (one small, the other medium) you place the stash in the bottom of the larger cup. Put a lid on the smaller cup and then place it inside the larger cup. It now looks like you simply have a medium drink.
Benefits: This method is almost undetectable without physically removing the lid or getting help from a canine. Larger cups also hold progressively larger quantities for those long road trips to base camp. Works especially well for stealthily moving concentrates
Drawbacks: Limited on size to about an eighth to a quarter ounce of flower. Also doesn’t provide an odor barrier by itself so additional precautions are needed if that bad is stanky.

Grind it!

Method: If you want to make a little bit go further, you can grind it. This is especially helpful with dense, tightly packed nugs. You can use a small chunk of herb as a screen to cover the bowl hole which prevents the ground material from being sucked through.
Benefits: Increased surface area makes weed burn better and produce denser and more flavorful smoke. It also increases the overall volume which can turn a single small nug  into two small bowls.
Drawbacks: It can be easy to suck it though the bottom of the bowl so a screen of some kind is needed. Ground product burns faster than solid nugs and dries out faster. Grinding also releases many of the terpenes trapped within a nug so don’t grind more than you are going to smoke in one sitting.
I hope these tips were helpful. Be sure to share them with friends if you liked them. I would love to know what tricks you use to keep your stash safe and in top condition. Thanks for reading.

wrr

Light and How Cannabis Consumes It

In the eons before dinosaurs, plants dined on light.

During the early formation of our planet, there was no oxygen to breath, only water and light. This paradise of water and photons gave rise to the first plants. Not like the orchids and redwoods we are accustomed to today, early plants were mostly algae in the early oceans. These early plants developed a way to transform light into food.
By using sunlight to convert light energy into chemical energy, plants were able to store it for later use. Although photosynthesis is performed differently by different species, the process always begins when energy from light is absorbed by proteins called reaction centers that contain green chlorophyll pigments.
In plants like cannabis, these proteins are held inside organelles called chloroplasts, which are most abundant in leaf cells. In the light-dependent reactions, one molecule of the pigment chlorophyll absorbs one photon and loses one electron. This electron is passed to a modified form of chlorophyll called pheophytin and the process propels a chain reaction of life.
cannabis lights

Plants can use light from across the visible spectrum for photosynthesis.

Yet some wavelengths of light are more useful to a plant than others. Wavelengths that the plant uses a lot of get absorbed into its leaves and stem while wavelengths they don’t use get reflected back. We only see plants as green because they don’t use green light energy. They reflect the one color they don’t photosynthesize so we perceive them as green.
Because of how plants evolved their ability to photosynthesize, different wavelengths are needed in greater amounts at certain stages of a plant’s growth, such as the blue and red. Light high in the blue range enhances vegetative growth, while red light strongly influences flowering and fruiting.
What we perceive as visible light is comprised of seven main colors. All the odd colors we see like pinks, browns, and beiges are just mixtures of other colors. Our eyes can only register wavelengths of light are within the 400 to 700nm range. Below 400nm, we move towards ultra violet, x-ray and finally gamma rays. Above 700nm is infra red, then microwave and finally radio waves.

Let’s start with some measurements.

Nanometres (nm) are a measurement of light waves. Each degree in Kelvin (°K) rates the ‘temperature’ of a light and offers an indication to the peak nanometers (nm) or color within the spectrum. The lower the nm, the more blue the light appears while higher numbers look red.
Marijuana uses light from approximately 420nm through to 750nm. But what does that mean? To understand the unique diet of cannabis (and make those real yield gains) we need to create the ideal environment for the plants.
Giving them just any light simply won’t do if the goal is heavy crops (and who doesn’t want that?). Normal incandescent bulbs produce more high energy wavelengths like infra red (heat) and midrange light (550-650nm) than anything else. Anyone who has tried to grow a plant in a room lit only by incandescent bulbs can attest to their poor performance so avoid trying to grow with them.

Even light in the right wavelength may not have the right amount of lumens.

Cannabis need light from the right part of the spectrum with the right amount of intensity to encourage proper yet fast growth. Marijuana evolved to grow under sunlight which changes intensity over the seasons. Young weed plants can be easily burned if put under the same intensity of light as a mature ones.
For this reason, many cultivators use different lighting techniques for the different stages of plant growth. Fluorescent lights produce the right wavelengths for growth but lack the intensity of other lighting options making them the standard for use with seedlings and young clones. HPS (High Pressure Sodium) and MH(Metal Halide) are industry standard lighting options that are used during vegetative and flowering stages although LED (Light Emitting Diode) are quickly establishing themselves as premium lights in the market.
HPS light

There are a few different types of light.

HPS lights offer light from approximately 540 through to 700 nm, typically yellow, amber and red light so they are great for flowering/budding marijuana. These lights tend to burn hot and need to be ventilated as well as hung from a decent distance from the plants. This makes having a tall area to grow in a priority. Luckily, the light produced by HPS lights penetrates deeply into thick canopies which is perfect for the flowering stage when buds and leaves are competing for room.
MH lights offer light from approximately 350 to 550 nm in the blue, green to yellow range.  However exact levels depend on what lamp your purchase as some lamps are ‘cooler’ and others a bit ‘warmer’ than average. MH lights are good for the vegetative stage but not as much for the flowering/bud stage.

Lighting is going high tech.

LED grow lights can have a mix of LED diodes in a single ballast or specialized ones. This gives cultivators one more variable to work with but it also opens up a whole world of adjustment. With the increased lifespan of diodes over bulbs, reduced energy consumption and lower heat production, it is easy to see why cultivators are switching to LED.
While LEDs are far more efficient then HPS or MH lights (with almost 30% savings reported on average) they come with a significantly higher initial price tag. Small projects and weekend cultivators may not want to shell out the cash needed to obtain a quality growing LED but commercial outfits normally opt to go with the reduced energy consumption and quickly make back the difference in initial price.
LEDs also have the benefit of not needing specialized heat venting as they produce almost no heat.  While HPS and MH lights require ducting, fans and additional controllers, LED lights don’t need any of that while providing a dynamic mix of color temperatures. The best LEDs are full spectrum and use some blues, some reds and a very stable white to create broad (full) spectrum LED grow light. These are the new breed of grow light and cover the full light range from around 420 through 750 nm.

SuperCropping

Super Cropping: Why It's the Best Ever

What is Super Cropping exactly?

Super cropping (also supercropping) is the name for a High-Stress Training (HST) technique where the plant is stressed by slightly hurting it in a strategic way. Super cropping is basically just a coined word for growing a bush-like plant by crushing its stems instead of cutting them off. This technique can be performed on virtually every cannabis plant (excluding autos) and can actually be done multiple times during the vegetative process.
Super cropping is most effective with 600 watt lights or bigger because they allow good light penetration. If growing a bush style plant from clones, it’s important to top the plant right after the clone roots. Doing so will provide a strong base where the extra branches start low on the trunk.
Cannabis plants become stronger after recovering from trauma. Things like bent or crushed stems can become even larger and stronger than undamaged stems. If the main cola (flower) of a cannabis plant is removed, the plant will put energy into growing the remaining colas. Each super crop basically  doubles the number of potential colas on a plant.

What Does Super Cropping Do?

After super cropping the plant will grow bushier, produce more buds, and possibly even produce more THC! This is how the plant naturally responses to danger and protects itself. Growers take advantage of this technique to get bigger yields and more potent buds than would be produced otherwise.
If the goal is to harvest the biggest and the best buds, you should actively stress the plant in a way that will result in an increase in the production of cannabinoids. If the aim is to get a better harvest, “super cropping” is by far the best method of stressing your marijuana before harvesting.
Of the 483 known compounds in Cannabis, Tetrahydrocannabinol (THC) is the primary psychoactive component of cannabis and produced in the plants trichomes. The second major component is CBD. It is also considered to have a wider scope of medical applications than THC because of study results in treating epilepsy, anxiety disorders, nausea etc. Both are produced in greater amounts by plants that have been properly super cropped.
Super Cropping Bud

How do we ‘stress’ the marijuana plant?

Super cropping works along with Low Stress Training, or LST. LST is the simple process of training your cannabis plant to grow laterally. This is usually done by tying down the branches of the plant to stop it from growing vertically. Light is one of the most important factors contributing to the growth of a plant so when it comes to cannabis, light dictates when a plant produces its flowers and how well those individual buds develop.
The main idea of super-cropping is to get marijuana to expose as many branches as possible to direct light and induce the plant to produce more leaves, buds and flowers. To apply the method, a certain amount of stress must be applied to your plant.
By exerting gentle pressure firm enough to slightly damage the tissues, a grower can intensely escalate marijuana yields. Because of the special stress response that takes place within the plant, the risk of infection or splitting is also minimized.

The technique is really simple.

Choose the most suitable branches you want to super crop. Start by doing only a few branches at a time, you will make sure that the plant reacts well to the stress technique. Remember that the goal is to stress the plant, not kill it.
After selecting the spot, gently hold the branch between the thumbs and forefingers of your hand and while gently exerting firm pressure, soften the inner tissues and carefully roll the branch between your fingers until stem feels limp in that spot.
A severely damaged branch may be beyond natural repair, especially if the branch is visibly split. Applying grafting tape or Duct tape will help to strengthen the damaged branch during the healing process.

Super Cropping takes advantage of natural processes.

When it’s time for a plant to flower, the size of the buds it produces is largely dependent on light exposure. The more light (in the right wavelengths) a certain part of the plant canopy gets, the stronger and bigger it is likely to be. That’s why the crown of a plant usually has denser, bigger flowers than the bottom.
Super cropping allows you to manipulate a plant and its canopy for maximum exposure. By ensuring the entire canopy gets evenly exposed to light, growers encourage it to build big, dense buds. This is true even in areas normally be covered by foliage.
For its own survival, the plants growth mechanism will cause it to ‘set’ the break and keep the limb in place after it is done healing. Arranging super cropped tops horizontally creates an environment for increased bud production as colas that would have been under the main cola are exposed to direct light.

Super crop at the right time.

Be really careful because this method is designed to induce the plant to throw out a greater number of colas and new leaves. Being too aggressive can have seriously negative results.  Following the logic of nature, this method works because the plant is deceived into believing that it is under attack by some force and therefore it will compensate.
In the process of healing, the branch will grow a protective nodule to strengthen the damaged area. This ensures that transpiration of essential nutrients and water are not restricted. Growing the nodule is a key step of maintaining the overall health of the plant.
Since this technique requires time for the plant to heal, the best time to super crop is in the plants’ vegetative or growing stage. During the second or third week of growth will likely be most effective time. How will you know? When the plant produces vigorous new branches but has not yet fully started the flowering stage, it’s time.
By super cropping, cultivators enjoy shorter and more controlled plants that produces a great number of branches and buds. Even though the plant needs more time to recover, proper super cropping does not retard the growth of the plant like pruning of the tops or picking leaves to induce growth.