coco coir

Coco Coir Growing Technique Basics

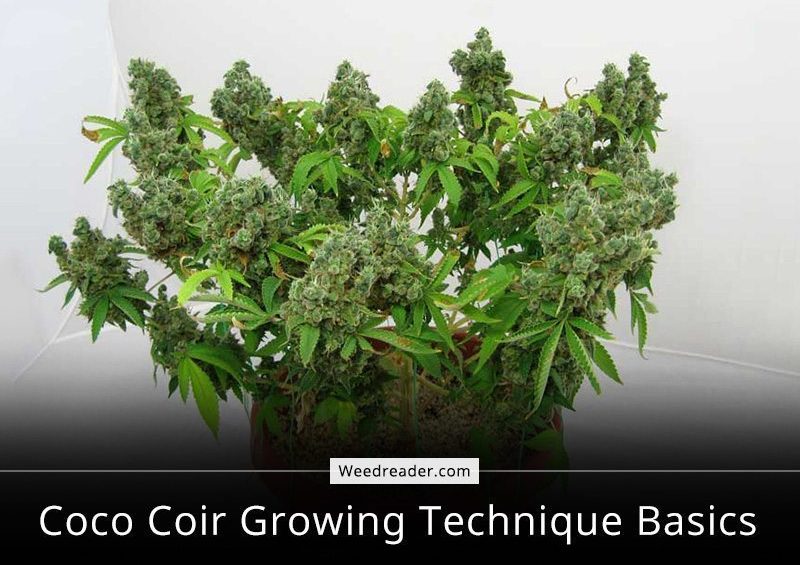
Coco Coir is one of the most versatile mediums you can grow in.

Coco coir is derived from the coconut hull. It is made from the fibrous material between the outer husk and the inner meat. Originally, coir was used for cordage and ropes in ancient India but has also been used for mats and other flooring. In the 1980s, coir became popular in Holland to grow roses and lilies.
Coir is a lot like peat moss, but sustainable and eco-friendly. It can take centuries to re-grow peat moss once harvested but more coco coir is only a few ground up coconut husks away. Because coir promoted root growth, growers started using it for hydroponic gardening in place of peat moss. Eventually the economics of coco coir has helped it become one of the most popular grow mediums today.
Coco coir acts like a sponge and retains just the right amount of moisture for plants to grow in addition to being reusable. Where peat moss bogs can take decades to recover, coco is truly renewable as it converts annual waste into a usable product. Coco is also robust enough to last multiple harvests with the right care.

Coco coir reduces waste at its source and for the grower. coco coir

After harvest, giving coco a quick flush will get it ready to go back in the pot and nourish a new plant. It is recommended to use in no more than 3 grows before replacing entirely though. Having to replace the grow medium every cycle eats up profit so commercial operations find coco coir especially enticing.
It is also easily renewable, unlike peat moss. An average coconut tree produces 150 coconuts a year, so there is a continual supply of a product that would otherwise be considered waste. Some experts estimate that peat bogs take as long as 25 years to renew, while coco coir is an annual product.
While some growers use coco in soil based growing, it is more ideal for use in hydroponic operations. In soil it acts as a water retainer and aerator but as a soil replacement it has really comes into its own. The biggest reason it works so much better for hydro systems comes down to the fact that it has a neutral pH.

The neutral pH of coir is a huge benefit. pest control

Peat moss is considered acidic (it has a pH of 3.3 to 4) and requires additives to balance for growing cannabis. Coco coir on the other hand, is normally between a pH of 5.2 and 6.8. This means coco coir is ready to use without additives that can mess with the chemistry of nutrients.
Coco coir can also store nutrients for later use by the plant. This makes it ideal for drain to waste as well as drip systems because of how long the period between feedings/watering is. It is able to accomplish this nutrient storage because of an especially high cation exchange rate.

Nutritionally, coco is also an excellent choice. Indoor growing

Depending on the source, coco coir it is rich in potassium, iron, manganese, copper and zinc. If growing hydroponically, this needs to be taken into consideration to provide the correct balance of nutrients. Coco coir can also store nutrients and release them as needed due to a high cation exchange rate. Interestingly, it tends to hold on to calcium and magnesium more than other nutrients.
Coir also promotes the growth of beneficial bacteria because of compounds called lignins. Not only will beneficial bacteria thrive in the presence of lignins, they help to minimize harmful bacteria. This means a cultivator can expect better growth, higher yields and less diseases.

It can hold water like no other.CBD Flower 1

Coco coir holds water exceptionally well while still promoting good drainage and aeration. The material also prevents nutrients from leaching. The feeding schedule for a typical hydro drip system is three  15 minute cycles within an 18 hr period. Watering more than this won’t hurt the plant (unless you are also adding nutrients) but isn’t needed.
Because coco coir drains so well, it’s almost impossible to over water plants under normal conditions. Even saturated, coco coir retains a moisture to aeration ratio near 70:30. This prevents roots form ever sitting in anaerobic water ( a death sentence for roots). As long as the coco never dries out completely, coco coir provides reliable results.

It doesn’t retain nutrients forever.CBD Flower

Coco coir is mostly inert and won’t hold onto nutrients for very long. If there is a nutrient deficiency, correcting it is as easy as supplementing during the next watering cycle. The coco coir makes nutrients immediately available to a plant’s roots so recovery from deficiencies as fast as possible.
If the plant gets overfeed, a quick and thorough flush removes practically every trace of nutrients. This makes it so plants can recover from nutrient lockout even faster without risking damage to the roots.
Adding perlite to help wick up the coco also helps against root rot. Make sure to wash brick supplied coco as it is notorious for having a high salt content. Any high end pre-bagged coco will be virtually saltless and closer to neutral pH. Adding salt and algae removers to the nutrient mix is considered safe and prevents drip blockage down the road.

The best reason to switch to coco coir is getting much bigger yields.living cannabis garden

Plants grow bigger in coco coir systems than in soil given the same care. The overall boost to growth may not be quite as massive as methods like deep water culture, but they’re pretty close. In addition, coco coir is much easier to deal with.
Coco coir is eco-friendly, versatile, easy and more productive than soil. With those benefits, there is little reason to use anything else. Coco is available in pellets, bricks, sheets and ready-to-use bags. It can be found almost anywhere you can purchase potting soil, and in a pinch, can even be found it in the reptile section of local pet stores.
Coco coir presents a great compromise between full hydro and soil systems. Plants grow faster, get bigger and yield up to 25% more than in soil. It is also more forgiving than straight hydro setups which makes coir a great stepping stone. Coco coir offers a less demanding option to cultivators looking to grow the best cannabis out there.

I’d love to hear your thoughts.

Did I miss something important? Have you grown with coco coir before? What do you think new cultivators need to know about growing with it? Let us know your thoughts in the comments down below. Thanks for reading.

canna pests

Treating Common Cannabis Pests

Spider mites, thrips, fungus gnats…

If you are a cannabis grower you’ve likely been warned about these insects more than once. There are many pests that can endanger your crops. But some turn up a lot more often than others. Knowing how to identify and deal with the most common offenders can  be the difference between doing some extra work and losing a whole crop.
To start off, the best way to prevent a garden infestation is through prevention. Being aware of the symptoms and, above all, knowing how to eradicate them efficiently can save hundreds or even thousands of dollars. Not to mention months of caring for them. The main goal is to not give any potential pests or diseases a place to hide/nest/grow. This is best accomplished with some soap.
Wash the walls, floors and all surfaces with soap and water. Using diluted chlorine, bleach (although never together) or other disinfectant works too. Do the same with pots, buckets, utensils and any other equipment you plan to use. Make sure that nothing comes into the garden that might be able to carry stowaways.

It’s important to make sure everything is clean inside and out.

When changing reservoirs, make sure to wash and disinfect them as well. You never know what might be growing in there, even if the previous plant didn’t show signs of problems, eventually something will go wrong.
You may also want to cover the floor with plastic sheeting. The kind available at most home improvement stores but thick enough that you won’t tear through it. Carpets and similar flooring types make great homes for both pests and molds/fungi. Covering them with plastic ensures that they remain in good condition and won’t offer sanctuary to pests.
Keeping your air and water temperatures along with room humidity at the ideal levels while using adequate air circulation will prevent most pests/infections from ever getting started in a marijuana grow. As will filtering the air intake to block the path many marijuana pests use to gain access to the plants.

Soil-borne pests

One of the many advantages to using hydroponic/aeroponic systems to grow cannabis is that they prevent many insect and other infestations. There is no place for many types of larvae to incubate or hatch. When choosing soil, look for sterilized or composted soil. If using native soil, make sure to sterilize or compost it as well to prevent hitchhikers.
Covering soil in diatomaceous earth will prevent flying and crawling insects from laying eggs in your corp. This is because the sharp edges damage their tiny bodies like rubbing them across sand-paper. A less effective alternative uses a 1/2” or so of fine perlite on top of the soil as a barrier. Insect eggs generally don’t grow in perlite and most insects wont burrow deep enough to hit soil.

 Spider mites

garden pestsBest Prevention:
Keep the room clean throughout the grow. Fully disinfect and sterilize everything before attempting to start the grow. Also make sure to keep the room tidy and free of excess soil.

How to Identify:

Spider mites live underneath the leaves plants and are invisible to the naked or untrained eye. The mites drink the chlorophyll for sustenance. They also have eight legs which classifies them as a tiny spider instead of as an insect.
Spider mites are visible under a magnifying power of 15x or more. The magnified mites are whitish, red, or (most commonly) brown with two spots. These mites spin webs which makes them easier to spot. Once seen, it unfortunately means the mites are already a generation or two in.
Misting the undersides of leaves reveals the webs easily to the naked eye. Once fertilized, females remain so for life. After mating they can lay about 100 eggs every 5 days. With 75% of all spider mite eggs being female, their numbers can grow rapidly.

Repression Measures:

Spider mites ideal temperatures range between 70 and 80F or 21-27C. They also need average to high humidity to stay happy. Cooling a grow room to 60F/16C and dropping the relative humidity slows the reproduction rate of the spider mite.
Cooling the room reduces the damage an infestation can do. At 50% humidity and below the mites start getting uncomfortable. By spraying jets of water across undersides of leaves, growers can blast larger colonies loose and slow the spread of these pests considerably.

Best Predators:

Neoseiulus (Amblyseius) californicus and Mesoseiulus (phytoseiulus) longipes are the two most common and effective options out there. They can eat up to 20 eggs or 5 adult mites every day. And once their food supply runs out, they die off.

Sprays:

Neem oil is the most effective spray available. Other effective methods include pyrethrum, horticultural oil, and insecticidal soap. Spraying three times at 5 to 10 days apart should destroy a mite population if the room remains clean. Spider mite eggs hatch after 5-10 days which makes a second application necessary.
The first spray kills the adults while the second destroys newly hatched mites. A third application will kill any stragglers left behind. Make sure to also cycle to another chemical if using pyrethrum to spay frequently. This ensures mites don’t develop a resistance to the synthetic chemical. Several miticides have DDT or fungal relatives that are toxic if inhaled by humans so choose your miticide carefully.

Thrips

Best Prevention:

Keeping a clean grow area is the only defense against a thrip infestation. These miniscule insects avoid detection by even by the most cautious grower until they reach damaging levels. Best to make sure they don’t feel welcome in the garden in the first place.

how to Identify:

The thrip hits greenhouse more than any other garden. It’s difficult for the thrip to reproduce in large quantities outdoors and they must hitchhike into indoor gardens. Their small size helps them fit through all but the finest screens and finters.
Thrips can be almost any color, move very quickly and can fly which can make it hard to get a good look at them. Thrips tend to move in herds though, grazing tiny strips off the top of leaves like tiny lawnmowers. This can strip plants of chlorophyll so thoroughly that the leaves become brittle, dark, and begin to crumble. Tiny black lines across leaf surface are fecal trails left after gorging themselves.
The flying thrip easily infests gardens if protected from outdoor conditions. The female bores a hole into the plant and leaves her eggs in a hole. The opening is so small a magnifying glass is needed to even see it. In marijuana, the thrip colonies primarily infest and reproduce inside buds. A good shake of a cola infested with thrips produces a cloud as the tiny pests fall, jump and fly  out of the buds.

Repression Measures:

Using powerful fans to move air throughout a greenhouse or growroom can prevent the thrip from latching on to plants or taking flight. Regularly misting plants with water will flood the thrips and slow their travel, reproduction, and minimize their ability to damage the plant. Sticky traps do help, however the thip doesn’t migrate much. Which reduces the effectiveness of sticky traps.

Best Predators:

Nearly any predatory mite can effectively battle thrips. Parasitic wasps work but the size of thrip populations limit their ability to be effective. You might be able to see herds skittering across your plant. And while crushing them will reduce their numbers, it is of course not effective overall.

Spray:

Pyrethrum or insecticidal soap sprayed 2-4 times at 5-10 day intervals is the recommended treatment.

Fungus Gnat

Best Prevention:

Keep the relative humidity of your garden low, and don’t over water. Make sure the surface of your grow medium doesn’t stay soggy. Covering hydroponic medium surfaces also prevents growth of green algae which can entice these pests.

How to Identify:

Fungus gnats attack plants during their adult and larval stages. The maggots are almost invisible to the human eye. This is compounded by their see-through bodies and a black heads. The maggots infest the upper roots of plants and will spread throughout an entire hydroponic root system.
Fungus gnat maggots love dark, dank, and water soaked environments. Checking the medium at the base of a plant reveals these pests. The gnat larvae are also perfectly happy going through their life in rockwool. They infest root systems, damage larger roots and consume root hairs. This results in the plant weakening, slowing its growth, and visible fading of foliage.
Adult gnats are normally grey to black, so small they are hard to see and have disproportionately long legs. Females are prolifically breeders, laying an average of 200 eggs weekly. They can also usually be found at the base of your plant along with their maggots. They basically have a Hulk-like grip and are basically impossible to remove by force.

Repression Measures:

Damaged roots make marijuana insanely vulnerable to several types of fungus and prevents nutrient uptake. Maggots will consume decaying plant matter. This means that infestations reproduce faster the more damaged your plant becomes. Reducing surface moisture in your plants medium will slow fungus gnats reproduction dramatically. basically, the drier the better. Applying an anti-algae product to the base of plants kills any green algae currently growing. It also reduces the number of food sources of maggots. Yellow sticky traps placed 2 inches away from the growing medium will catch most adults looking to spread.

Best Predators:

There are no predators proven to be effective at controlling gnat populations themselves. Although the predatory soil mite Hypoaspis and the nematode Steinemema feltiae severely impact the insect population in soil grows. Unfortunately, they are not effective countermeasures for hydroponic applications. It is also impossible to force them out. Swatting a few adults doesn’t kill the eggs they lay underground.

Spray:

Neem or insecticidal soap applied as a soil drench kills eggs and larvae in 1-3 applications. Spray containing the fungal culture Bacillus thuringiensis var. israelensis (Bt-i) successfully eradicates adult gnats. The soil drenches and spray should be applied simultaneously every 5-10 days.

Do you agree?

There are way more ways to fight off these pests than I could possibly list on my own. Let us know in the comments below what pests you have come across and what you have found to be effective. I’d love to hear what else you think should have been included. Thanks for reading.