Wake and Bake Waffle Cakes

Recipe: Wake and Bake Waffle Cakes

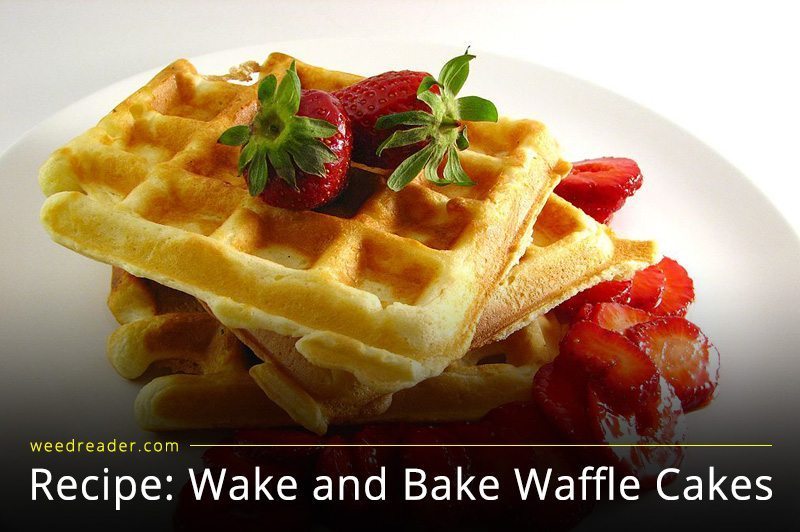
Wake and bake with these waffle cakes! This batter recipe can be used for pancakes, too! With a little more sugar and some cinnamon and nutmeg, these would also work fantastically as donuts. If you have a fancy donut pan, or even just a mini-muffin tin, go ahead and try it!

Recipe makes roughly six 4″ x 4 1/2″ waffles. I do not have a round waffle maker! So bake according to manufacturer’s instructions, if you have one. Two waffles per person ought to give a sweet buzz.

INGREDIENTS

1 3/4 cup millet flour (or GF flour blend)
1/2 cup rolled oats
2 or 3 tbs ground flax seed
1/8 tsp salt
1 1/2 tsp baking powder
2 tbs of sugar (if you want them sweeter)

1 cup almond or soy milk
1 tsp apple cider vinegar
3 tbs maple syrup
1/3 cup melted cannabutter
1 1/2 tsp vanilla extract

optional: cinnamon, nutmeg, bananas, blueberries, walnuts, peanut butter

waffle iron
frying pan (for pancakes)
non-stick cooking spray
two bowls
whisk

DIRECTIONS

1. Measure out the almond milk, then add the tsp of ACV. Let it sit and curdle for a few minutes–this creates “butter”milk! Which makes the waffles nice and fluffy.

2. In one of the mixing bowls, combine all dry ingredients. When I first tried these waffles, I didn’t use any extra/added sugar (though technically, I guess maple syrup counts as sugar). For breakfast, I go with hearty, but not heavy! Whatever floats your boat, though. Try coconut sugar, or brown sugar for a richer flavor.

3. To the dry mixture, add all of the wet ingredients. Whisk together until thoroughly combined. Now’s the time to throw in any other spices, nuts, or fruit. If you decide to turn the batter into pancakes, then I highly recommend tossing in some fresh or frozen blueberries, chopped bananas, or mini chocolate chips. Set that bowl aside to let the flaxseed thicken up the batter.

4. Preheat your waffle iron according to the machine’s instructions (I’m guessing most come with a dial for time/crispiness, and a red and green light to indicate completion. Try setting it to a 3 or 4, for golden brown waffles), and coat both sides with non-stick cooking spray. Or, before it’s hot, grease the waffle iron with a paper towel dabbed in melted canna butter.

5. When it’s ready, start spooning batter onto the iron. I used about 1/2 of a cup of batter per waffle, but go by your own device and measure. Basically, the batter should fill the entire waffle indent without spilling over,  and you should be able to close the iron with little overflow. While your first batch cooks, do some clean up, or prep toppings by chopping nuts or fruit.

6. Let waffles bake to the desired level of doneness. I like them golden and crispy on the outside, chewy on the inside, but I always struggle to keep them that way while the second batch bakes.  Preheat your oven to 200F and lay the first batch of waffles in a single layer on a baking sheet. Slide that sucker into the oven to fix any issues of lukewarm waffles (just don’t forget they’re in there!), then get started on the second batch. Keep going until all batter is used.

7. Serve waffles warm and immediately, with fruit, maple syrup, whipped cream, and loads and loads of vegan butter. When they’re hot, I suggest melting even more canna butter on top, just to be sure you’re getting the most out of this wake-and-bake breakfast.

IF YOU DECIDE PANCAKES or DONUTS:

Perform steps 1-3. For pancakes, grease a griddle or frying pan and keep on medium-high heat. Non-stick pans and spatulas will work best for this. Spoon a reasonable amount of batter per pancake onto the griddle, then flip when edges pull towards the middle and the batter on top bubbles evenly. I am terrible at making uniform pancakes, so forget being fancy. Make whatever you’re happy with!

For donuts, grease a donut pan or mini-muffin pan (or a regular muffin pan, whatever you want, man), fill each indent about half-way, then slide in an oven set to 350F. Bake until donuts or muffins rise and turn golden brown. Top with canna butter, vegan cream cheese, cinnamon & sugar, or sprinkles.

image credit: eatyourcannabis

weedreader Recipe No Churn Avocado Lime Ice Cream

Recipe: No-Churn Avocado Lime Ice Cream

I cannot get over how simple and delicious this recipe is. Dairy-free, nut free, and soy-free, this ice cream is perfect for a bright, refreshing dessert that satisfies all allergen worries.

Recipe makes enough to evenly stone/serve 4 people. Goes fantastically with the Raw 4th of July Pie.


INGREDIENTS

3 medium or 2 large avocados
1 can sweetened condensed coconut milk
or the cream from 1 can full-fat coconut milk, boiled down with 1 1/2 cups sugar + canna butter

3 tbs cannabutter, softened
zest and juice from 4 limes
maple syrup
pinch of sea salt

DIRECTIONS

1. Remove pits from avocados and scoop meat into a mixing bowl. Juice and zest the limes, then add to the avocados. Add the canna butter. Begin mashing them together, gradually adding more juice/zest and salt to taste. (It will soon taste weird, like sweet guacamole, but trust me.)

2. If you can find sweetened condensed coconut milk, this recipe will shorten considerably. If you got it, open the can + dump it into the bowl. Beat together with a whisk or a hand-held blender.

2a. If you have just the coconut milk, flip it upside down and open it. Drain and save the separated water, then scoop out the cream into a pan. A double boiler would ensure it from burning while you cook. Either way, add sugar and canna butter to the cream. Keep on medium heat; do not allow the mixture to boil. Once liquid is reduced but thickened (when the oil cooks into the cream), remove from heat and allow to cool slightly. Add to step 1’s mix of stuff and combine thoroughly.

3. Pour or scoop entire mixture into freezer-safe container.

————

Because the base is avocados, this ice cream will (or shouldn’t) freeze completely. A few minutes to soften and it’s the consistency of frozen yogurt, super creamy, and irresistibly sweet and tart. And bright lime-green!

Seriously, start freezing your produce and see what happens. Avocados and bananas, sliced, then frozen, then blended in a food processor, will create a texture remarkably similar to dairy ice cream–especially the bananas. Experiment with adding in different toppings, fruits, syrups, and create your very own flavors!
image credit: littlebigh.com

WR pot brownies

Recipe: Fudge You Up Pot Brownies

Dense, chocolatey, chewy, and fudgey as… well, fudge. A vegan and gluten-free spin on the classic pot brownie. Top with nuts or chocolate chips for variety!

The recipe makes roughly 12 brownies, though slice them how you please! One 2 x 3 inch slice is surely enough to stone somebody solid.

INGREDIENTS

2 cups oat flour (or a blend of oat + almond, coconut, or rice flour)
    + more as needed
1/4 cup whole flaxseed
3 tbs milled flaxseed + 6 tbs non-dairy milk
1/4 tsp baking soda
4 tbs raw cacao or cocoa powder
AVB (already vaped bud, for extra buzz)
4 tbs powdered coconut sugar (blitz regular coconut sugar in a coffee or spice grinder)
3 tbs maple syrup
1/3 cup cannabutter, softened
1/3 cup unsweetened applesauce
1 banana
2 tbs vanilla extract
3 pinches of salt

Optional additions:
chocolate chips, nuts, coconut flakes

coconut oil for greasing
or parchment paper for lining
spatula
hand or stand mixer & bowl
baking dish, 9 x 9 for thicker + denser brownies or 9 x 13 for thinner

DIRECTIONS

1. Preheat the oven to 350F. I tend to do 375F when I’m impatient, though it’s your call. If you need to, do the prep steps first; make powdered sugar or oat flour if you need to. Do this by pulsing oats several times in a food processor until a flour forms. Creating powdered sugar is virtually the same, though a coffee or spice grinder will be easiest to use.

2. Prepare flax ‘eggs’ by combining the ground flaxseed with the non-dairy milk, in a small bowl. Then, set aside and wait for it to congeal. Chia seeds + water would work as well!

3a. If using a hand mixer: in a large mixing bowl, combine oat flour, whole flax seeds, baking soda, sugar, cocoa powder, and salt, and AVB (already vaped bud) if desired. Next, stir in applesauce, vanilla extract, maple syrup, flax eggs, and the cannabutter with a spatula. Then, blend in the banana with the hand mixer until a dough forms.

3b. If using a food processor: Add all above ingredients including ‘optionals’ if using, and blend. The ending texture should be somewhere between a batter and a dough–not too gooey, not too stiff. If it’s too stiff, add sips of water or milk until the mix is slightly sticky. If it’s too wet, add pinches of flour until sticky.

4. Transfer dough to a greased baking dish. (note: Using parchment paper will be the easiest clean-up overall, but the brownies come out a little crispier/chewier at the edges when baked in a greased pan).  Then, press it down with the spatula to remove any air bubbles, and smooth over the top. Bake uncovered for 25-30 mins, or until a crackle top forms, and it achieves a cake-like texture when a toothpick is inserted. When cool, top, slice, and serve.

————-

It is very, very important that you allow these brownies to cool to at least room temperature before slicing. They will hold together much better, and you won’t run the risk of burning your mouth before you can taste anything good! With any edible, start slowly. Eat 1 brownie and wait 20 minutes before deciding whether you need to eat another. And remember, there are consequences to everything! You might get high, but too much sugar at once could cause a crash rather than a blissful, relaxing experience. So, munch wisely!

image credit: theweedscene

raw pie

Recipe: Raw Pie for the 4th of July

A bright and mouthwateringly delicious raw pie for the 4th of July! No oven or baking required. Dairy and soy-free, but this is not a recipe for those allergic to nuts!

One 2-inch slice will be enough to feel something fun, and ideally the tart will serve at least 8 people. As with any recipe, read the whole thing first. Then, perform the steps in the order they appear.

INGREDIENTS

Crust
4-6 large dates
1 1/2/ cups shredded coconut
a handful of almonds
1 cup walnuts
1/4 cup flaxseeds
1/2 cup pecans
(if you have a nut allergy, sub the nuts for 2 cups of oats and another 1/4 cup of flaxseeds)
lemon zest
1 tbs vanilla
2 pinches of salt
3 tbs of canna butter

Fruit Layer
1 cup + 1 1/2 cups blueberries
1 cup + 1 1/2 cups raspberries
1/4 cup chia seeds
maple syrup
lemon juice

‘Cream’ Layer
2 tbs cannabutter
2 cups coconut flakes
vanilla extract
maple syrup

DIRECTIONS

Crust
1. Pit and soak dates in hot water for 20 mins. Then, pulse all together till a somewhat crumbly, sticky ball forms, that holds when pressed together.

2. Grease a pie or tart pan (I used a cheesecake pan) with canna butter, then press crust into desired shape. Set in freezer to firm for fifteen minutes or longer.

Fruit Layer
1. While crust is firming, mash 1 cup blueberries and 1 cup raspberries together with some lemon juice. Feel free to use other berries; strawberries, blackberries, or even go the extra mile and pit some cherries to throw in. Just use whatever’s red and blue!

2. Add the chia seeds, some maple syrup, and stir together. When left in the fridge, the chia seeds will soften and form a consistency similar to jelly or jam. Add more maple syrup or lemon juice to taste, then leave the mix undisturbed in the fridge for at least ten minutes.

Cream Layer
1. Blend all ingredients at high speed with a hand mixer or in a food processor until a paste forms. Add in more canna butter (I suggest coconut oil-based) if mix remains crumbly.

ASSEMBLY

1. Remove crust from freezer. Dump in the remaining 3 cups of berries, then drizzle over or pour in the cream layer. You will need to work quickly if you want an even layer, as the cream will solidify due to the coldness of the crust. Save a small amount to drizzle over the fruit, if you wish.

2. Take the fruit ‘jelly’ you made out of the fridge, then spread it over the tart with a silicone or rubber spatula. Make sure the filling covers the loose fruit and reaches the line of crust; you want everything to surely hold together, as this won’t be baked (but it’ll get you baked).

3. Add the rest of the cream, if you kept it. Garnish with lemon zest or a sprinkling of coconut sugar.

4. Stick the whole thing back into the fridge until solid and ready to serve.

———-

You can top this tart with more berries, a dollop of coconut cream (just open a can of full-fat coconut milk and use a scoop of the separated cream), or your favorite ice cream. this dessert happens to pair fantastically with sherbet, or try a crack at the recipe for Avocado Lime ice cream and really knock your own socks off!

hot chocolate marijuana

Creamy Dreamy Hot Chocolate

Drink this rich, creamy hot cocoa, and in no time you’ll feel as toasted as a roasted chestnut.

Main recipe serves 2 or 3 people, roughly 8oz each, but can easily be doubled or tripled for larger batches.

INGREDIENTS:

1 can of coconut milk
water or soy/plant milk
maple syrup
cacao or cocoa powder, as much as desired
2-3 tbs  coconut or date sugar, more to taste (raw sugars are best, but whatever is on hand is fine)
1/8 tsp of cinnamon
pinch of salt
3 tbs cannabutter

optional:
chipotle or cayenne pepper, marshmallows, coconut oil, whipped cream, coffee

stovetop
whisk or spatula
double boiler

DIRECTIONS:

1. Shake up the can of coconut milk, and open with a can opener. Into the top portion of a double boiler, pour the coconut milk, a dash of soy milk, and the 3 tbs of canna butter. Turn the burner on slightly lower than medium and let the liquid heat.

2. As it heats, whisk in small amounts of cacao or cocoa powder. The difference between the two: cacao powder tends to be raw, made directly from crushed cacao beans, where as cocoa is usually processed with sugar or other additives. If you’re using cocoa powder, be careful you don’t end up with a drink that’s so sweet you feel sick– modify the added sugar as you wish. Cacao powder will be a richer and more pure chocolate flavor, but more bitter than cocoa. If using cacao powder, add small amounts of maple syrup to taste.

3. Throw in the cinnamon and salt, with a pinch of chipotle or cayenne pepper for a Mexican-inspired hot chocolate. Keep whisking the mixture, so that no clumps of powder form and the sugar dissolves. A helpful hint, dry ingredients are easier to dissolve in cold liquid than in hot. Try to have most of your dry ingredients incorporated before the milk is too hot, and it should never boil. If you can’t resist, or find you need to add more cacao/cocoa, make a little slurry to the side by stirring in 1 part cacao/cocoa to 2 parts water or soy milk, then add that to the heated mixture. Like with all cooking, I encourage you taste as you go! It doesn’t have to be a surprise at the end, of whether or not your dish came out well.

4. Stir frequently, allowing the canna butter to cook with the fat of the coconut milk. The oil does begin to cook the whole mixture, after a little while, so if you like a thick hot chocolate, leave it as is and take the mix off heat when you’re ready. If you want a drink less creamy, add small amounts of water or other milk until desired consistency is reached. Set aside to cool a little.

5. Pour carefully into mugs or ladle it out with a spoon, like it’s the olden days and you’re about to settle down in front of a fire during a raging snowstorm. If you’re not into that sort of imagery, just serve up your hot cocoa, top with marshmallows, whipped cream, or other delights, and enjoy.

While I know summer is fast approaching and not many people are into hot drinks, nothing hits the spot like a cup of hot cocoa. If you’d like a more refreshing treat, make the same brew as above (so that the THC molecules still bind to the fat properly), then let it cool completely and serve in a glass over ice cubes. Same principle as iced coffee, which I’m sure would also be a delicious substitute for cocoa, if you aren’t a fan of chocolate (but why wouldn’t you be).

Edible Savories: Get-Baked Beans

Tangy, spicy, sweet, barbecue baked beans to get you baked. Serve either as a side or as a meal! The main recipe will serve/stone 3-4 people.

INGREDIENTS:

2 cups dried beans, pinto or navy, soaked overnight
or canned beans

WET

2 or 3 TBS cannabutter, melted
1/2 cup water
2 tbs tamari (soy sauce, use coconut aminos for a gluten-free option)
1/2 cup apple cider vinegar
2 TSP lemon juice
3 TBS tomato paste
small can of tomato puree
2 TSP  liquid smoke
1/4 cup molasses
1/4 cup maple syrup

DRY

1 TSP black pepper
1/2 TSP red pepper flakes
1 1/2 TSP onion powder
1 1/2 TSP garlic powder
1 TSP paprika
1/2 TSP salt
1/4 TSP cumin
1/8 TSP cloves
1 TSP chili powder

1 TBS of cornstarch
or
1 TBS of flax seed
casserole or baking dish
cover or foil

DIRECTIONS

THE LONG WAY

1. If you’re doing this the long way, rinse and soak 2 cups of dry beans for at least 8 hours. Change the water if it gets frothy/foamy or if it starts to smell funny. Either after 8 hours, overnight, or when you want them, bring the beans to a boil in fresh water, then reduce to a simmer and let it chill simmering for an hour and half. For extra flavor, cook the beans in broth or water mixed with vegetable stock.

2. While you wait for the beans, prepare the sauce. In a small bowl, whisk together all wet ingredients. Use less vinegar than you think you need, and go easy with the liquid smoke. A few drops should be more than enough to amp up the barbecue flavor.

3. In another bowl, throw together dry spices. If you’re really fancy, use fresh garlic and onion, otherwise I stick to the powdered kind for sauces. Adjust amounts as needed–more spice, add more black or red pepper, or chili powder. If you like a sweeter BBQ, try a pinch of cloves or allspice to bring out the richness of the maple and molasses.

4. Preheat your oven to 375F.  Dump the dry mix into the wet mix and combine thoroughly. Now would be the time to add in flaxseed or cornstarch! Whisk in your choice of thickener. Add a little more water or veg stock so that the sauce is pourable, thinner than a typical spaghetti sauce.

5.  In your chosen baking dish, pour in the semi-cooked, drained and rinsed beans. Then the sauce, covering the beans evenly (if your beans aren’t covered, add small amounts of vinegar/water/stock and stir until they are). If you’d like, throw in some chopped garlic and onions, mushrooms, extra canna butter, or additional spices. Cover the dish either with a lid or with foil. Bake on the middle rack for 45 mins, then bake uncovered for another 30. Serve however you want, at this point.

THE SHORTER WAY

1. I have saved massive amounts of time by having the beans soak/precook in a rice maker. If you want to do it this way, pour 2 cups of dried beans with 3-4 cups of water into your rice maker. Mine takes about 45 mins to run a cycle, so I precook the beans twice, stirring in between and adding more water as needed.

2. Follow steps 2-5 of THE LONG WAY. If you don’t want to make your own sauce, just go to step 5 and use store-bought BBQ sauce and mix it with the melted canna butter.

THE EASY-AS-SHIT WAY

1. Open can of beans, drain it, dump the beans in a baking dish. Squeeze out BBQ sauce from the bottle. Add the canna butter. Cover and bake at 375F until bubbly and clearly baked bean-like. Serve however you like.

image credit: thecannabist.co

cannabis tea biscuit

Recipe: Hot Buttery Cannabiscuits

Dough makes 8-12 biscuits, depending on size. Serving size is 1 or 2 biscuits.

INGREDIENTS

1 3/4 GF flour
1 packet quick rise yeast
1 1/2 cups hot water or hot milk (130-160F)
4 tbs cannabis oil, solid, cut into chunks like butter
1 tsp olive oil + more to grease
1 tsp salt
2-3 tbs guar gum
1 tsp baking powder
1 tbs coconut sugar + 1 or 2 tbs coconut sugar

Any herbs like:
basil
parsley
dill
rosemary
garlic
chili powder

parchment
cling film
baking pan
mixing bowl

DIRECTIONS

1. In 1 1/2 cups of hot water or milk, sprinkle 1 tbs sugar and packet of yeast. If it’s activated/live yeast, the mix should begin to bubble and foam a layer over the liquid. Let sit undisturbed for at least 5 minutes, so that the yeast can activate. If nothing happens, you might have a bunk packet– though, sometimes I’ve had luck with microwaving what I thought was dead yeast for a few seconds, and it activated just fine.

2. While the yeast does its thing, mix GF flour with your salt, baking powder, guar gum, sugar, and any herbs or spice you want thrown in in a large mixing bowl. I really like nutritional yeast, garlic, and rosemary, but sometimes I’ll do a sweetbread with nutmeg, cinnamon, and more sugar.

3. Drizzle in olive oil and pour in yeast mixture, once it’s good and foamy. Using a rubber or silicone spatula to mix the dough has always worked out well for me. I’ve never made this recipe in a stand or electric mixer, so go for that if it’s simpler. Incorporate wet with dry until a dough starts to form.

4. Cut in chunks of cannabis oil, continuing to stir and gently press dough into shape. Add flour in small amounts with guar gum if dough is too sticky or won’t hold together (it should, since we’re using active yeast).

5. When you can form the dough into a relatively smooth ball, you’re golden. Rub a small amount of olive oil all over the dough, just enough to lightly coat it, then cover bowl with cling film. Leave dough to rise in a warm place (a super easy way to make one is to turn on your oven to 350– but only for a few seconds! This will create a space warm enough to proof the dough but not hot enough to bake it) for at least an hour.

6. After your dough has risen, take off the cling film and line a baking sheet with parchment paper for easy clean-up. Grease VERY lightly with olive oil. Set your oven to 350F (and leave it there this time). In whatever shape you want, add rows of dough blobs to the pan, evenly spaced until the pan is filled. The biscuits will rise a little more but not by much; the main idea is, give them enough room to cook.

7. Your oven rack should be set a notch above the middle. Pastries/breads cook best there, without burning either end. Bake biscuits for 25-30 mins, until golden brown. To make sure this is achieved, brush biscuits with melted vegan butter at the 10 and 20 minute mark.   

image credit: ediblesclub.com

Cherry Cheezecake Fudge Recipe

Cherry Cheezecake Fudge Recipe

This fudge will soften to a frosting-like consistency at room temperature because of the coconut oil, so get fancy on the fly with that and spread it over a scone, a bagel, or a cookie. There’s no added sugar in this recipe, so make a butt-load and give a batch to your friends!

2 or 3 pieces should do you, if you can stop yourself from eating the whole tray.

WHAT YOU NEED:

1/2 cup softened coconut butter, or

2 cups shredded coconut, blended (I mean really blend the shit out of it, adding tiny bits of coconut oil to ease the way) until smooth

2 tbs canna butter (coconut oil** based is best)

2 tbs tart cherry concentrate

seeds from 1 vanilla pod, or a tsp of vanilla extract

handful of dried cherries, chopped

coconut flakes if you want

nuts if you want

maple syrup to taste

small bowl

spatula

flat-bottomed container for storage

DIRECTIONS:

1. Blend all ingredients except cherries and nuts.

2. For easiest servings and clean up, spoon or pour fudge batter into a flat-bottomed container and smooth out with a spatula. Incorporate the solid ingredients if you like texture throughout the fudge, otherwise press the dried cherries, coconut, or nuts into the fudge as toppings.

3. Make even scores through the mixture with a toothpick or knife to make cutting or breaking pieces off easier.  Pop the container in the freezer and it will be set/firm enough within an hour or so, otherwise it will keep quite well in the fridge.

**Nutiva â„¢ just came out with a coconut oil with added vegan buttery flavor. I used some for this recipe, and that’s what brought out the rich likeness of a cheesecake crust. Honestly, it tastes better than dairy butter, acts just like it in baking recipes, and is perfect for smothering over popcorn. It doesn’t leave the kernels soggy or greasy, it’s incredibly rich in flavor, and because the coconut oil will set/harden, the popcorn doesn’t go stale. So, try swapping out dairy butter for a week with a jar of Nutiva’s coconut oil, and see if you can notice a difference in both how you feel, and what you’re tasting.

STONER SMOOTHIES

Stoner Smoothies

Here are a few of my favorite smoothie recipes, altered to make your cannabis experience fresh, frozen, or drinkable. These will only really work if you use coconut oil-based cannabutter, since cream or dairy butter would be pretty nasty. It will incorporate best softened but not melted, and added in as scoops.

Extras: plant protein powder, mushroom powder blends, tea pollen, chia seeds, flax seeds

Each recipe should make either 1 large smoothie, or fill two 16 oz glasses.

THE RAW CBD (Choco-Banana-Dank)

2 or more tbs raw cacao powder

2 bananas

half an avocado

1 tbs almond butter

maple syrup or 2 pitted dates to sweeten

1/4 tsp cinnamon

1 tbs CBD oil

2 tbs canna-oil

soy, almond, or other nut milk

Blend all ingredients in blender until smooth. This smoothie is thick, very filling, and very chocolatey depending on how much cacao powder you add. For an easier drink, add more milk. You could also swap cinnamon for nutmeg, or protein powder, some lucuma powder, or another favorite add-in.

CBD (cannabidiol), for those unfamiliar, is one of the non psychoactive cannabinoids found in cannabis. From the Bluebird Botanicals website, where you can learn all about and purchase various CBD oils:

“Cannabidiol (CBD) is a naturally occurring constituent of agricultural hemp. It is the most abundant non-psychoactive cannabinoid in hemp/cannabis, and is commonly used as a food supplement to support general wellness.† Our CBD products are made from the highest quality, EU-certified hemp cultivars, which are grown in pristine soil in select European locations. Our CBD oils are constantly analyzed for their potency and purity from potential contaminants.”

Because it’s hemp-derived, the sale of CBD in the US is 100% legal, and Bluebird Botanicals ships anywhere in the US. In an upcoming review, I’ll speak more in-depth about BBB and a few of their products, as well as my experience in taking CBD oil.

But for now, a few benefits to consuming CBD:

-It contains essential amino acids, B, D, and E vitamins, and loads of trace minerals

-Improves flexibility, hair, skin & nails with essential fatty acids, Omega-3 and Omega-6 (note: the ratio of Omega-6 and Omega-3 in Americans is 10:1 or even 30:1 –way too high. Both work to produce anti-inflammatory proteins, but a 1:1 balance is needed to synthesize properly and effectively. Up your O3 intake with flaxseed [milled/ground/oil], chia seeds, walnuts, marine algae-based sources, or hemp oil.)

-Contains terpenes and flavonoids, which very basically affect smell and taste receptors.

Terpenes work both with taste and aroma in the plant or organic matter–in cannabis, they create the diverse perfume/scent profiles of each strain. Flavonoids give plants their pigmentation and in some cases, inhibit plant disease and infection, reduce inflammation and cholesterol, and have anti-cancer properties. Red, blue, purple, and yellow foods all contain anti-oxidants and most all foods contain flavonoids, and increasing consumption of color-rich foods like berries or dark chocolate could yield great benefit.

STRAWBERRY BANANA BLITZ

1 cup strawberries

2 bananas

1/2 cup dark or tart cherries

1/2 raspberries

1 or 2 cups orange or apple juice

2 tbs canna-oil

A puckered take on a sweet favorite. Blend together, use all fresh fruit for high fiber and store-bought consistency, or use frozen fruit for a smoothie more thick and slushy-like.

RAINBOW DREAM

cherries

raspberries

mango

orange juice

pineapple

banana

kale

honeydew melon

blueberries

blackberries

2 tbs canna-oil

Use apple or orange juice, since milk might cause some interesting flavor interaction. The basic idea is to include 1-2 fruits/veg of each color. In fact, the more colors in food in a day you can consume, the better! Like I said in the CBD smoothie recipe, richer colors means richer benefits. And, if you can, source organically & cruelty free.

A combination of fresh/frozen is best. You can make frozen fruit out of fresh fruit–just wash, slice, and lay out on wax paper & a baking sheet or silicone mat in the freezer until solid. Store chunks of fruit in tupperware or plastic bags. To make adding kale to smoothies way easier, do something similar–wash and cut up some fresh kale, let freeze in small piles or pack into an empty ice cube tray, then store once frozen.

COCONUT KALE AÇAI

kale

frozen açai berries or puree

full-fat coconut milk

coconut water

frozen mixed berries

canna-oil

For this smoothie, I’d recommend using some frozen kale, unless you’ve got a high-powered blender that can cut up leafy greens well. Otherwise blend 1/2 can coconut milk, 2 chunks of kale, a cup of açai berries or a puree packet, a handful of frozen mixed berries, canna-oil and coconut water as needed for desired consistency.

Sambazon â„¢ do 4 packs of frozen açai berry puree, sweetened or unsweetened. Fresh berries are harder to find unless you’ve got a bangin’ farmer’s market or specialty shops, so hit up the frozen section on your next food trip and see what they’ve got.

image credit: thestonerscookbook.com

Poppyweed cake

Lemon Poppyweed Cake (or Bars)

Makes about 16 bars or 1 loaf, sliced however you please.

What You Need

-2 cups oat flour (or a blend of oat + almond, coconut, or rice flour)

-3 tbs milled flaxseed + 6 tbs non-dairy milk

-1 tsp baking powder

-2 tbs chia seeds

-3 tbs poppy seeds

-AVB (already vaped bud, if you want a boost)

-1/3 cup shredded or flaked coconut

-2 tbs powdered coconut sugar (blitz regular coconut sugar in a spice grinder)

-1/3 cup cannabutter, melted

-1/3 cup unsweetened applesauce

-1 banana

-juice from 2 lemons

-2-3 tbs lemon zest

-1 tbs orange zest

-sea salt

-coconut oil for greasing

-spatula

-hand or stand mixer & bowl

-9 x 9 baking dish or small loaf pan

toppings: coconut sugar & lemon juice, frosting, cashew cream, candied lemon peel (see notes for a few how-tos)

Directions

1. Preheat an oven (it should probably be your oven) to 350ºF. Grease either a baking dish or loaf pan. In a small bowl, combine flax + milk, chia seeds, and poppy seeds, and set aside. Zest one and juice both the lemons and zest an orange, separating juice and zest. Only a little is needed, so lay out the leftover orange zest to dry & have it for future use!

2a. If using a hand mixer: In a large bowl, stir together flour, coconut, citrus zest, baking powder, coconut sugar and salt, and AVB (already vaped bud) if desired. Stir in applesauce, lemon juice, and cannabutter with a spatula, then blend in the banana and flax/chia/poppy with the hand mixer.

2b. If using a stand mixer: Add all above ingredients & blend. The ending texture should be between a batter and a dough–not too gooey, not too stiff. If it’s too stiff, add sips of water or milk until the mix is slightly sticky. Too wet, add pinches of flour until sticky.

3. Transfer dough to baking dish or loaf pan. Press it down with the spatula to remove any air bubbles, and smooth over the top. Bake uncovered for 25-30 mins, or until golden brown & the edges start to pull away. When cool, top, slice, and serve.

Optional Toptionals

Sugar & Lemon: 10 mins before cake is finished, drizzle lemon juice and sugar over the top to form a sweet, crunchy crust.

Frosting: Whip either softened canna butter (if made with coconut oil), some soy yogurt, or full-fat coconut milk with a splash of vanilla extract and powdered sugar until thick & spreadable.

Cashew Cream: Soak 1/2 cup raw unsalted cashews in hot water for 30 mins, then blend with 1 tbs vanilla extract, a pinch or two of orange zest, and a shake of salt until creamy. Chill in the fridge before use, stores up to 1 week.

Candied Lemon Peel: If you’re the type to read the whole recipe before executing, great! If not, hope you didn’t throw away the juiced lemons. Grab that unzested lemon peel and remove as much of the white pith as you can. Cut the rind into strips, then gently boil in sugar water until translucent. Toss in sugar and let dry on wax paper.

Lemon poppyseed cake is one of my most favorite baked treats, since it’s delicious as muffins, squares, or fistfuls. It’s tangy, moist, versatile, and now it can get you stoned! The combination of applesauce and banana binds and provides the perfect springy texture, poppy and chia seeds give it crunch, and the bud brings the buzz. 🙂

image credit: weedchefs.com